Hey, are you looking for the process of fixing the damaged plastic gas tank of your mower? If so, then you don’t need to search anymore. Want to know why? Keep reading to know the reason.
Actually, due to long time use or accidents, plastic built gas tanks can be damaged, broken, leak, crack or split. And you know a damaged gas tank loses its ability to hold gasoline and as a result, your lawnmower becomes useless to you.
But should you quit? No, not at all. Because the fixing process of the plastic built gas tank is quite simple. You just need patience and proper attention to do it.
In this article, we will give you a proper guideline on how to fix a plastic gas tank on a lawnmower.
So, without wasting time, let’s fix it.
In this content you’ll learn:
A complete guideline to fix plastic gas tank on lawnmower
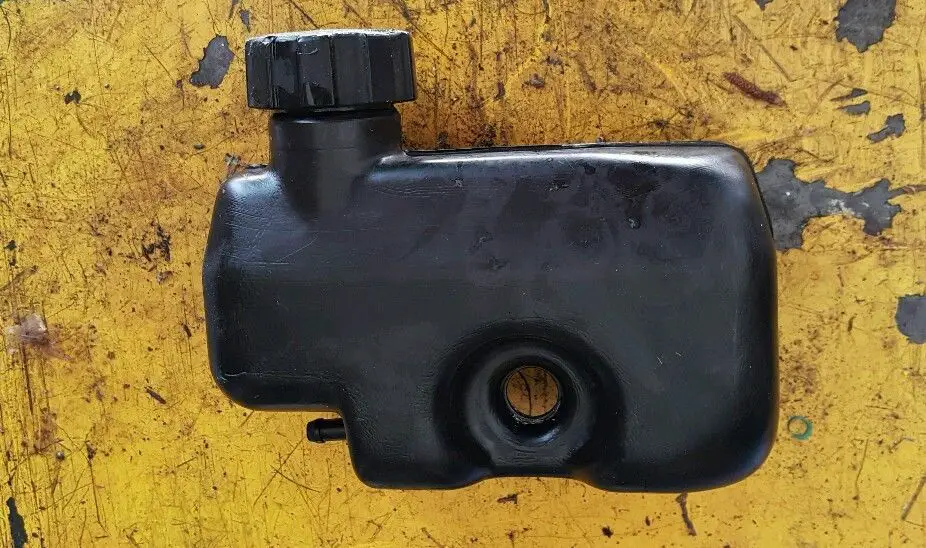
Basically the gas tank of the lawnmowers is built from polyethylene. And you can easily fix the damaged or broken plastic built gas tank at home. You will approximately need 25-30 minutes to complete the task.
Before starting the fixing process, you have to gather the required tools that you need to fix the gas tank. Plastic repairing doesn’t need too many tools.
Required tools:
- A heat gun
- A box knife
- A metal built painting spatula
- A flathead screwdriver
- A plastic bottle
- Paper towel
- Hand gloves
- Goggles
That’s all you will actually need to fix the gas tank. Now, you are ready to fix it. Follow the steps outlined below to fix the damaged or broken plastic gas tank of your lawnmower.
Steps to follow:
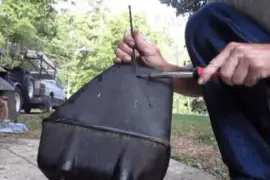
Step #1: Remove and Clean The Gas Tank
Remove the damaged gas tank from the mower and clean all the dirt attached to the gas tank. Clean the gas tank with liquid soap and warm water until the smell of the gasoline is properly removed. Rub the tank with alcohol to remove all the unwanted pieces of dirt.
Step #2: Use Knife To Cut Plastic Pieces
Now use the box knife to remove all kinds of loose strings of plastic from the damaged area. Take the measurement of the damaged area.
Cut the plastic bottle according to your measurement so that it can completely cover the damaged area. Always try to cut 1.5 times larger plastic pieces than the damaged area. Do not cut the plastic bottle just by looking or guessing with the naked eye.
Step #3: Prepare For Heating
When the patch material is ready, now it’s time for heating the things. In the time of heating, two things you need to care about.
- Heat the damaged area from a distance so that the plastic never burns or produces smoke.
- The mere goal should be to make the plastic flexible without melting it or losing the shape.
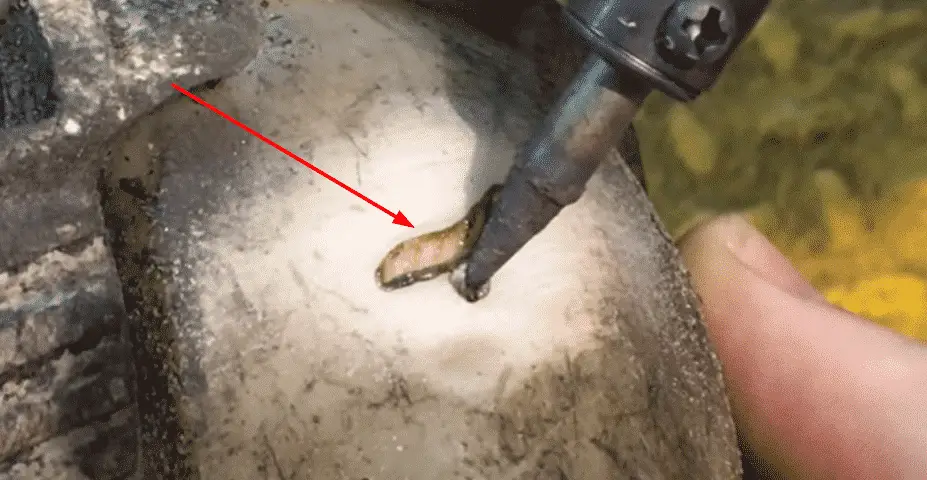
Step #4: Heat The Damaged Area
Now, take the heat gun and start heating the damaged area. Heat the damaged area from a distance to make it pliable.
Step #5: Place The Patch Material
When you see the place is slowly becoming flexible and feeling a little wet, just place the pre-prepared patch material in that place. Continue heating until the patch element becomes wet as well. Remove the heat gun and place it in a safe place.
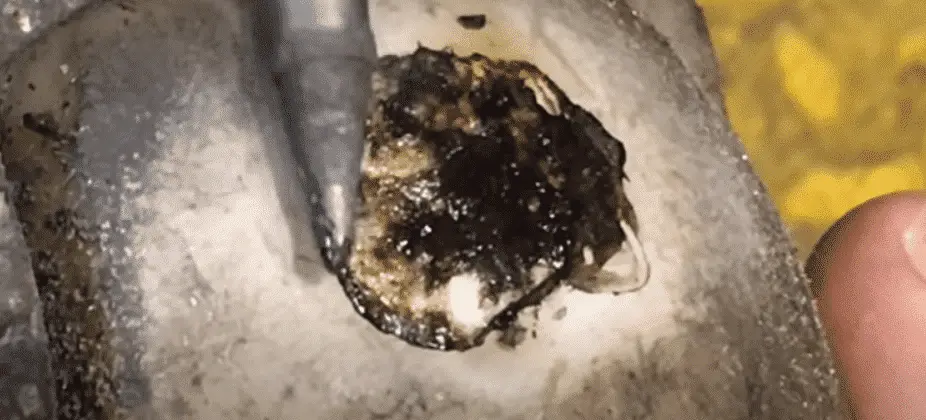
Step #6: Apply Light Pressure To Set It Properly
Take the painting spatula and apply light pressure in the heating area to remove any bubble from that area. Don’t put too much pressure because it ruins the shape of the tank. Wait for a while so that the patch element sticks well to the tank.
Check the tank when the patch is cool. If you feel that the patch is thin, apply another patch again following the previous process.
Step #7: Refill The Gas Tank
Clean the repair area with a paper towel. Now, fill the gas tank with gasoline to check the tank. Carefully inspect the tank to see if there are any leaks. If there is no leakage, then your tank is ready to hold the gasoline again.
Recommendations:
- Clean all materials and the gas tank before starting the fixing process.
- Heat the gas tank slowly otherwise it will burn or be damaged.
- Use a plastic built patch element when repairing a plastic gas tank.
- Test the plastic piece before fixing it with the tank. Because every plastic has a different melting temperature.
Cautions:
- Do not touch hot plastic in bare hands.
- Vacant the gas tank before fixing it. Otherwise, it may explode when you will heat the tank.
- If any leakage appears after fixing, vacant the gas tank completely and cleans it to fix it again.
Final verdict
To sum up, fixing a plastic gas tank is not a troublesome task. You just need to manage some time to fix it. Try to fix it at home because the price of a new gas tank is a bit higher.
You know follow the above-mentioned process and the cautions as well will help you to complete the task easily.
Hopefully, from this article, you have got the proper guidelines on how to fix a plastic gas tank on a lawnmower.
Now, fix it and enjoy mowing!