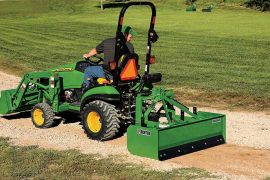
Grading a yard is not a difficult job if you have a tractor and the necessary information on how to efficiently operate the tractor. Developing the proper skills will make your job significantly easier and produce better results. So, on that note, are you looking to know more about how to grade a yard with a tractor?
Essentially, there are a number of important steps to follow for grading a yard with your tractor.
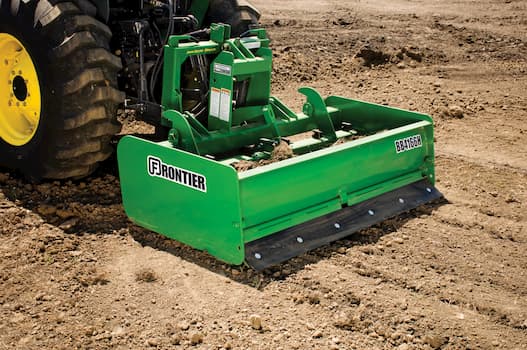
Furthermore, you will need a box scraper tool, a three sided metal box, which is handy equipment for: leveling soil, filling holes, changing drainage systems, as well as creating a smooth grading surface.
To know more about using the tractor for grading your yard, check out our guidelines below.
Why Do You Need To Grade A Yard Properly?
There are some safety issues that can occur if you are new to grading a yard with a tractor. For example, using excess water in your yard will change the drainage and ultimately, damage the foundation.
Heavy rainfall is another instance where you need to drain all excess water from your yard. Again, if the water drainage system is not appropriate, you will inevitably encounter significant problems going forward. So, knowing the correct way to grade a yard with a tractor is quite crucial.
How To Grade A Yard With A Tractor?
Grading a yard with a tractor is not difficult if you know how to operate a tractor. So, how to grade a yard with a tractor? Well, the following outline will guide you through a step-by-step process:
- Firstly, the box scraper tool (mentioned above) needs to be adjusted. You have to install it to the tractor’s hitch. The box scraper comes with:
- A single hitch,
- A wheeled,
- and a smaller unit
You need to adjust the tool’s wheels so that they can interact gently with other surfaces.
- The hydraulic hitch requires three different points to be adjusted. To level the unit, adjust two arms (lower) as well as adjusting the upper link.
At first, you need to attach the box scraper and once that is done, adjust the upper link with your required need. Never lower the shanks or teeth until you have arrived at the exact job location.
- The hydraulic lift needs to be checked properly. Examine the lift to confirm whether it’s working properly or not. While working with tractors and power equipment, examine all the safety issues before moving forward. Then, to avoid damaging the implement, drop it slowly.
- The project site should be investigated. When you’ve completed your planning, you’re now ready to start the grading process. Firstly, have a walk through the entire area and thoroughly investigate the site.
After that, make a second pass that is parallel to the first one to ensure that they align and the next steps will work properly.
- Sensitive areas have to be marked off. If there are any areas that still need to be preserved, then it’s better to mark them. You can use safety ribbons and stakes for protecting those sensitive areas which you don’t want to grade.
As you want to grade your yard with a tractor, it’s really important for you to know about a lower or higher spot of your site. Note that a tree’s roots normally extend beyond the drip line of the tree (branch margins).
- The safety protocol must be ensured when starting the grading. In order to avoid any potential accidents, it’s critical to ensure that pets, animals, children, or any individuals nearby, are out of the area where you will be working.
- The soil needs to be prepared for grading. It is one of the most important steps to keep the soil moist before starting to grade the yard. If the soil is too hard and dry, water them for several days to at least 6 inches depth.
However, if the yard remains too wet or too dry, then it will be impossible to level properly.
For preparing the soil, you need to use a box scraper as well as a tractor. With the help of the box scraper, you can spread the pile of gravel, soil, and other materials all over the ground. Take care while doing this task. Instead of driving over the large piles, work systematically and move materials in small portions and one-by-one, focus on one side then move on to the next.
- The tractor should be moved to the worksite. You have to take the tractor on the grade and push it into the soil in a forward direction. If the land isn’t spread out enough, you can simply use the blade to delicately press down on a pile of soil to spread the soil across the land area.
- You should begin by working through rough grading. It will help you to establish and evaluate your plan. But, this will require proper planning beforehand. For grading the whole yard properly, you can get some heavy equipment on rent like grader or trencer.
With the help of that equipment, you can dig into the ground so that area becomes leveler. Also, planning the process according to the layout of the land, before rough grading will help you to save work, money, time, and error.
- An even-grade plan needs to be developed. By dragging gravel and soil to some lower areas, you can easily develop an even and efficient grade plan, as it will help you to have a level surface. Moreover, the hydraulic lift control will help to maintain the grades while you are busy with your work.
- Be careful while grading areas with hills. In some cases, you may need to cut down the higher areas in order to maintain an even grade system. Additionally, you will need to lower the box scraper’s shanks, and then proceed to repeatedly cut over that path in a small amount.
Doing this will help you get your desired grade. Remember, perfection is not your goal at this point in the process. Systematic and repetitive work will always help you to create an even grade.
- The total area needs to be re-graded. Once you are done with the major corrections of grading, the box scraper shanks are able to rise again. From there, you can easily re-grade the whole area.
Once this is done, check the grade as well as the slope and compare it with the pattern you have planned for the drainage system. Remember, the drainage must always be sloped away from buildings, pathways, and driveways.
- Now, you can do the final grading. For this, you have to move and till the soil continuously until it’s level. If you have a consistent, smooth grade with zero-high spots, then congratulations! You have finished your final grading.
Final words:
Hopefully, we’ve provided everything you need to know about “how to grade a yard with a tractor”. As we have shown you, it’s not overly difficult once you understand the whole process. So, go through the article carefully and follow each and every step accordingly.
If you encounter any issues, or have any questions about any of the steps, let us know. We will try our best to help you.
So, what are you waiting for? Follow the guidelines and grade your yard meticulously using a tractor. Till then, good luck!