In this content you’ll learn:
Key Takeaways
- Knowing how to diagnose and replace a bad lawn mower drive belt is essential to your lawn mower’s health and performance.
- Diagnosing a bad lawn mower drive belt means seeing how well it drives and, if it drives poorly, checking the belt for issues such as looseness, cracks, brittleness, and so on.
- Fixing a bad lawn mower drive belt means replacing it with a fresh one.
Maintaining and knowing how to replace lawn mower drive belts is essential to ensuring that your lawn mower runs well and propels the drive wheels every time. But just how do you diagnose and replace a bad lawn mower drive belt?
How To Diagnose A Bad Lawn Mower Drive Belt
If you suspect your drive belt (also belts or V-belts) is faulty, take the following steps to ensure it’s the cause.
First, you’ll want to ensure the signs you notice point to this issue.
1 – Look For The Signs
The first sign you’ll notice is your lawn mower not driving as easily.
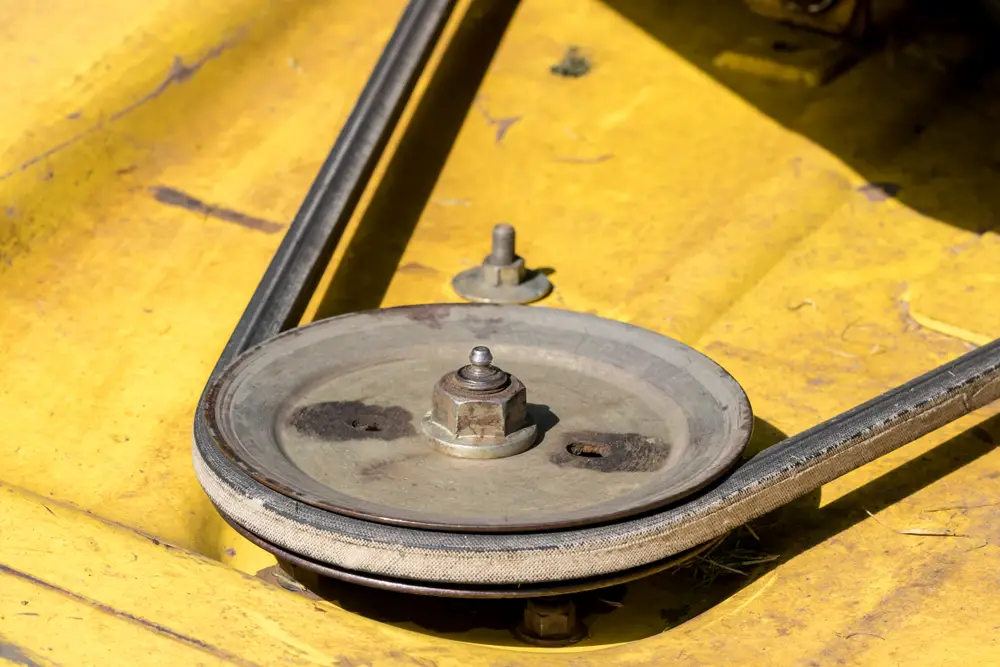
The drive belt is attached to your lawn mower’s back wheels or all four wheels, connected to a gearbox driving them through the drive belt connected to a crankshaft pulley. The crankshaft directly drives the lawn mower blade attached to the end of the shaft, while the pulley above the blades provides the connection to drive the lawn mower.
On lawn mowers with more than one set of blades attached to the cutting deck, a secondary drive belt is attached to the crankshaft, which provides power via a set of pulleys attached under the deck,
Over time, the sides of the drive belt stretch and wear down, making the belt looser and looser on the pulley.
The belt may also develop a slick, slippery surface glazing caused by heat buildup.
The heat may also cause the belt to become cracked and brittle, allowing it to slip on the pulleys or snap the belt in the worst case.
2 – Inspect The Belt
To check the state of the drive belt, unplug the spark plug wire and tip your lawn mower onto its handle so you can get underneath. Feel the belt’s edges to see if they are smooth or cracked.
If the belt feels brittle with cracks in the rubber, replace it before it breaks or jumps off the pulley while you’re mowing.
Remember, you’ll still be able to mow your lawn if the drive belt isn’t working, you’ll just have to push the lawn mower yourself instead of relying on it to drive itself.
How To Replace A Bad Lawn Mower Belt
Once you’ve determined that your lawn mower belt is the cause of your lawn mower’s issues, you’ll need to replace it.
Begin, as always, by taking the proper safety precautions.
1 – Take Proper Safety Precautions
Wear mechanic gloves to safeguard your hands from sharp edges and moving parts. Wear safety goggles to protect your eyes (even in this operation, with a low chance of harm to them).
Allow your lawn mower to cool down before you start working on it.
Always disconnect the spark plug to prevent your lawn mower from starting while working on it.
2 – Gather Needed Tools And Materials
Gather the following things:
- Gloves
- Safety goggles
- Socket set
- Blade-locking tool (or something else to hold it in place)
- Strap
- Belt replacement
3 – Prepare Your Lawn Mower
Tip your lawn mower onto its handle. Use a strap to tie it to your workbench or other anchor so the lawn mower doesn’t fall back down.
Remove the wire connected to your spark plug.
Then, place the blade locking tool and clamp it firmly to the side guard so the blade cannot move.
Use your socket wrench to undo the bolt holding the blade in place. Once the bolt is loose, remove the blade.
A black plastic cover usually covers the drive belt, held in place by several screws or bolts.
Undo the bolts holding the cover in place and remove them.
Many lawn mower models include a belt guide in the cover. The belt guide is two plastic guides that stick out inside the cover and keep the belt in place. These guides may snag on the belt, requiring you to twist the cover slightly to allow the belt to slide free of the guides.
4 – Remove The Old Drive Belt
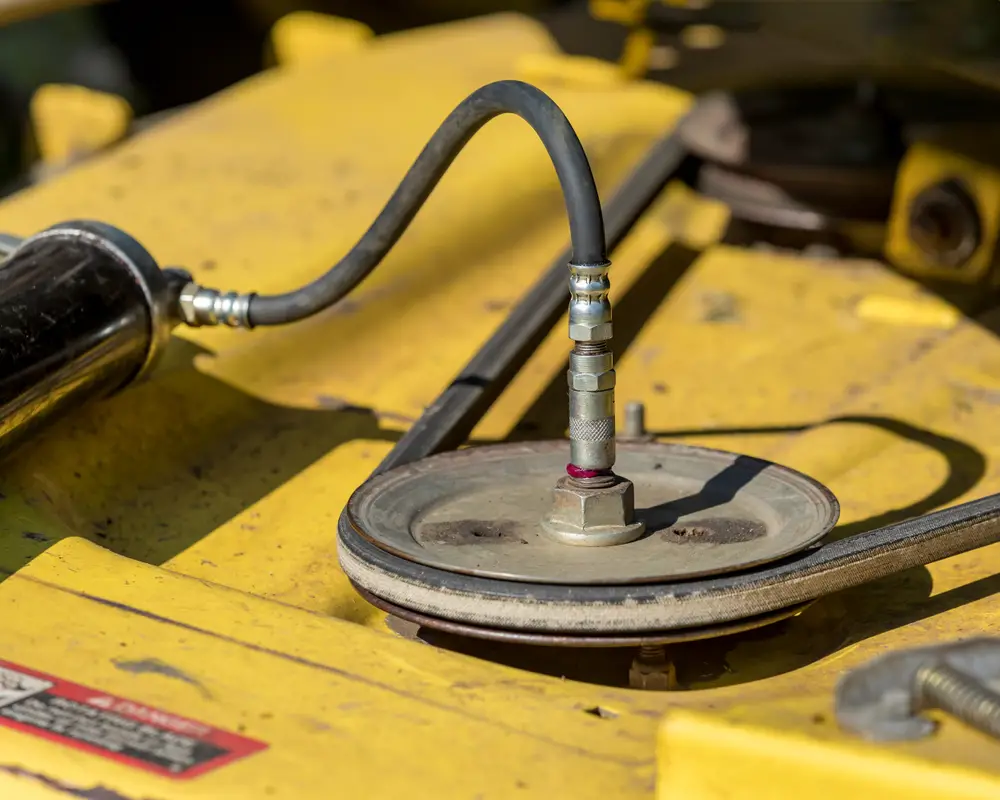
There is no tension in the belt when your lawn mower is switched off, so removing the belt is merely a matter of easing it off the pulleys using your fingers.
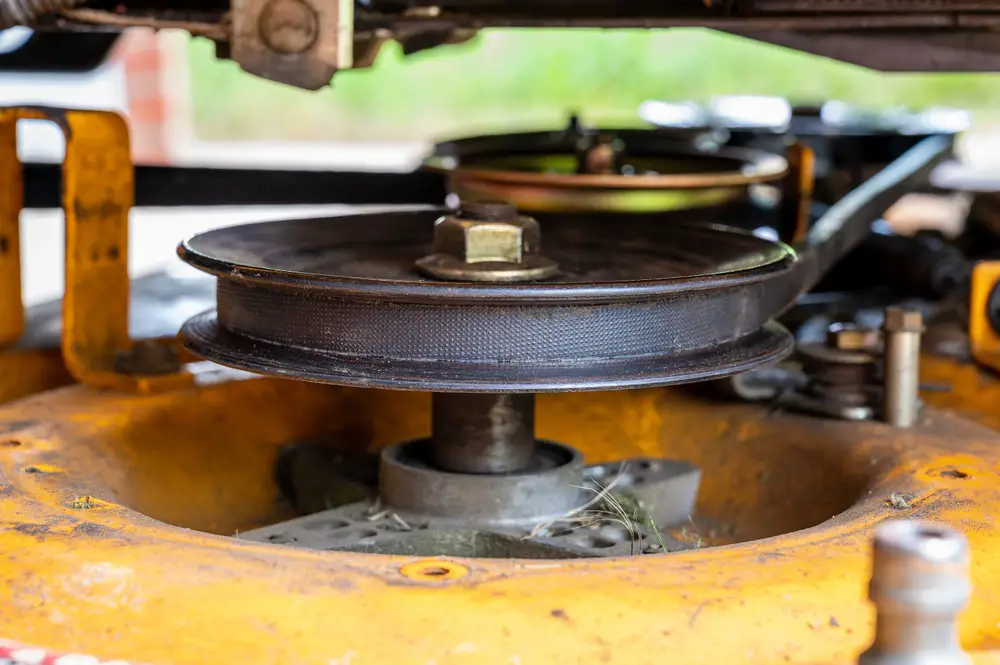
You may find that your lawn mower drive pulley slips down the engine’s drive shaft (the shaft to which the blade is attached) and has a few washers above it.
These pulleys have a notch that lines up with a notch on the drive shaft. To replace them, line up the notches and push the pulley up the drive shaft. Then, give the pulley a half-turn turn to stop it from falling back down the shaft.
5 – Install The New Belt
Take the new belt and slip one end over the pulley attached to the drive shaft. Pinch the other end of the belt in your fingers and insert it through the guides and onto the drive pulley attached to the back wheels.
To replace the pulley cover, insert the back end into place and then squeeze the belt with your fingers so that the belt fits inside the cover guides.
Push the cover up against the lawn mower cutting deck and insert the bolts holding it in place.
Re-install your lawn mower blade and insert the bolt with your fingers, turning it in until the bolt is tight.
Use a wrench to tighten the bolt fully or a torque wrench if you have one to apply the specified amount of torque from the lawn mower manual. Remove the lawn mower blade locking tool and return the lawn mower to the upright position.
6 – Test Your Lawn Mower
After re-attaching the spark plug lead, take the lawn mower outside and start your lawn mower.
Once running smoothly, pull on the handle to check if the drive belts are working properly and that the lawn mower propels itself forward.
Apply backward pressure on the lawn mower, preventing it from moving forward, to see if the wheels spin. If they do, the drive belt is adjusted correctly, and you have successfully replaced it.
Should the wheels not turn, check to see that the belt is correctly seated on both pulleys. Then, check that the cable attached to the drive control lever on the handle is tensioned correctly. A nut on the lever tightens the cable so that the drive belt engages the pulley.
Turn the adjusting nut clockwise a few turns and then re-test the drive power. Keep adjusting the nut until the lawn mower pulls forward strongly, spinning its wheels when you resist the pull.
Where To Order Lawn Mower Belts
Order your belts from a registered dealer or online through one of the many marketplaces stocking original manufacturer parts.
Your manual will have a parts number and a specification for your lawn mower’s correct size drive belt.
How Often To Inspect Your Lawn Mower Belts
Inspect your drive belt at least once during the year to ensure there isn’t any chance of it breaking and damaging your lawn mower blade. With the blades spinning at such high speeds, the broken belt can cause the blade to bend or impair its rotation, damaging the drive shaft or bearings.
My Experience With Diagnosing And Replacing Bad Lawn Mower Drive Belts
I was recently asked by a good friend to help with a problem he was having with his self-propelled lawn mower.
Having owned a few of these lawn mowers over the years, I’ve got a pretty good idea of the common problems with these machines. He explained that nothing really happened when he pulled on the control to make his lawn mower move forward. He could feel a bit of a tug on the handle, but there was no real forward motion at all.
This usually means the drive belt is worn, and it’s a quick fix if you’ve got the tools and the know-how.
When I got to his house, I noticed the lawn mower standing in his driveway and thought I’d just go and have a quick look at it first before I announced myself at the door. The first thing I noticed was that the cable running to his control lever was not adjusted at all.
The control nut was set right up against the lever. I gave it an anti-clockwise twist, which moved easily under my fingers. I rotated it as far as I could until the pressure from my fingers was not enough to turn it out any further.
My mate greeted me as I was finishing up, and I suggested we start his lawn mower and test it. He obliged me. Once the lawn mower was running, he gave a tentative pull on the handle. The lawn mower surged forward, and he gave me an astonished look.
I quickly explained he didn’t need a new drive belt, just a slight adjustment on the cable as it had stretched with use.
It’s been a couple of months now, and he’s still happily mowing his lawn; no belt replacement necessary.