If you are a garden lover, a lawnmower is a regular companion of your daily lifestyle. But you know since it is a tool, you can face many problems. The breaking or tearing of the pull cord is one of them.
A pull cord acts as the starter of a lawnmower. Without a pull cord, you can’t start a lawnmower.
Is your lawnmower useless for just a damaged pull cord?
No way. Nothing to worry about. Your lawnmower didn’t go useless. Replacement of the pull cord may again restore its functioning power.

But what to do when you need to replace this pull cord? Do you think the task is a hassle? Of course not.
If you don’t know how to replace pull cord on lawn mower at home, this article will let you know useful information about that.
And I believe, after that, replacing a pull cord will be an easy task for you. Then try to do this at home. It will save your repair costs.


Let’s start working without wasting time.
In this content you’ll learn:
Major Parts Of Lawn Mower Pull Cord Housing:
You definitely need to know what things are in lawn mower pull cord housing. If you know all the parts exactly, it will help you get things done in the simplest way. The major parts of a lawn mower pull cord housing are:
- Starter Pull Rope.
- Handle.
- Recoil spring.
- Pulley.
Process Of Replacing A Pull Cord On Lawn Mower:
Here, we will discuss the process of how to replace the pull cord on the lawn mower. And the whole process can take up to 30 minutes to complete. Be patient and stay with us.
First of all, as you will need to fix the pull cord of a lawn mower, here we will focus on the equipment that we need to replace it. .
- New pull rope with exact length and thickness
- Screwdriver
- Wrench
- Needle nose Pliers
- Lighter
- Hand gloves
Steps to follow:
Step #1: Make The Necessary Preparation
First, take the lawn mower to a flat surface. Don’t forget to wear hand gloves for protection.
Step #2: Disconnect Power Cord
Find the lawn mower’s power cord and safely disconnect it from the battery. This will protect you from being electrified.
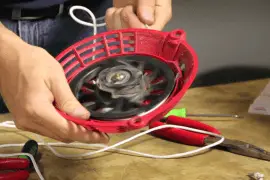
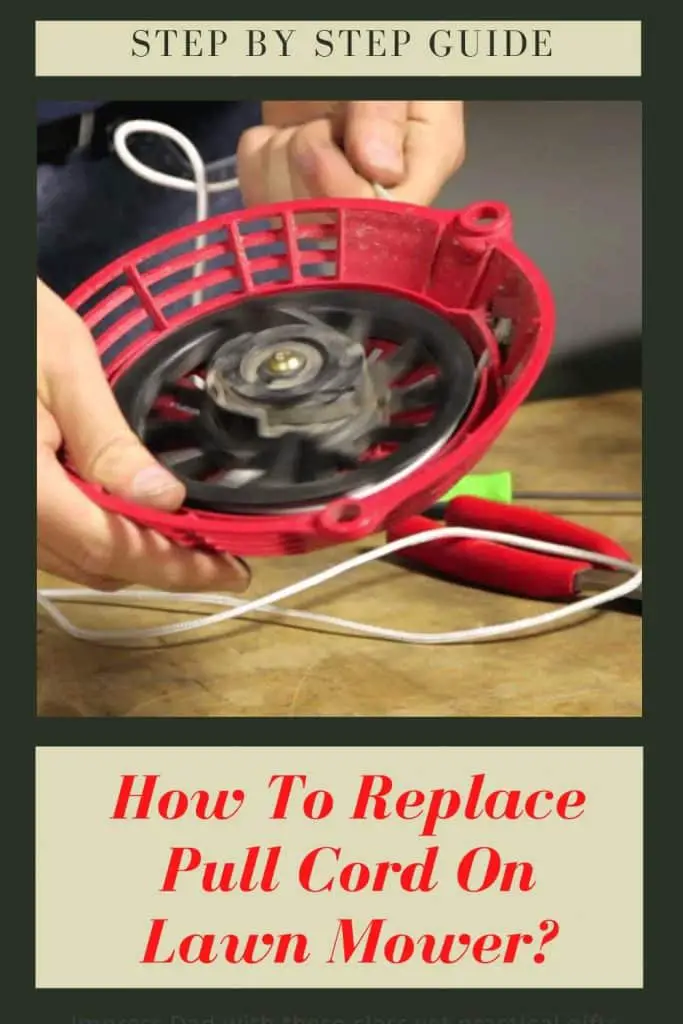
Step #3: Remove Rewind Housing Screws
Now, find out the 3 screws attached to the lawn mower’s rewind housing. Remove the screws using a screwdriver or wrench.
Step #4: Remove Old Broken Rope
Lightly hit the rewind housing to open it. Now find the knotted edge of the broken rope. Hold the edge tight with the pliers and pull out.
The edge from which the broken rope is pulled will be used to insert the new rope. You will find new ropes at any hardware store or engine repair shop.
Step #5: Settle The New Rope
Take the new rope this time. Put a knot on one end of the rope and enter the new rope with the same place as the old rope out.
Take care of the innerspring of the rewind. Around the pulley, slowly rotate it in the right direction and fasten the rope. Keep moving the pulley until you feel resistance.
Step #6: Rotate The Pulley
Keep the pulley rotating until the pores of the rewind housing and the pellets of the pulley are in the same position. Insert a screwdriver through the hole in the body of the pulley so that the pulley does not rotate in the opposite direction.
Step #7: Insert The Rope In The Rewind Housing
Insert the rope through the hole of the rewind housing and give it a knot. Heat the rope with a lighter. Pull it tight before returning to the previous position.
Step #8: Cut off Extra Rope
Remove the screwdriver and allow the rope to be fastened to the wheel. After returning everything to its previous position, cut it off if there is an extra rope.
Step #9: Replace The Rewind Housing
This time, carefully replace the rewind housing to its previous position. Reinstall the screws that were previously removed using a screwdriver or wrench. Tighten the screws.
Step #10: Reconnect Power Cord
Reconnect the power cord to the battery. Turn the lawn mower on and check to make sure everything is fine.
Cautions:
- At the beginning of the replacement, specify a place to hold the screws. That will free you from the hassle of losing the screws.
- Be careful when removing the screwdriver from innerspring so that your finger does not stick to the spring.
- Collect the user manual from the manufacturer’s website. If you have a problem while working, the user manual will guide you that how to fix the problem.
When It Is Necessary To Replace A Pull Cord Of Lawn Mower:
- When the lawn mower’s pull cord does not return to the housing properly.
- When the lawn mower’s pull cord is broken or damaged.
- When the lawn mower’s pull cord gets stuck in the housing or doesn’t come out.
Final Verdict:
The process we discussed is the general process for replacing a lawn mower’s pull cord. But keep in mind, the entire process we discussed is for small size lawn mowers.
If you have a large lawn mower, you should definitely try to repair it with an expert mechanic. In the case of a large size lawn mower, it may be risky for you to repair.
Hopefully, this article has helped you to know about how to replace pull cord on lawn mower.