A lawn mower is an integral tool for taking good care of any garden. A lawn mower stops functioning efficiently, if there is too much dirt trapped inside the carburetor.
The carburetor is a device which supplies adequate air and fuel mixture to an internal combustion engine, like the type of engine we can see in a typical Honda Lawn mower.
So,when dirt is accumulated in the carburetor, it hinders the injection of required combination of air & fuel into the engine. This stops the lawn mower from starting or moving. So,cleaning the carburetor properly is a very vital issue.
But cleaning this all by yourself can be very tough and tiresome, right? No, definitely not. Let’s guide you through the step-by-step instructions mentioned below which will let you clean the Honda lawn mower carburetor all by yourself.
The Steps For Honda Lawn Mower Carburetor Cleaning
If the engine oil remains in the carburetor for long, it may oxidize and clog the nozzle inside the carburetor. Again, small pebbles or rock can enter and block the carb .
To remove the leftover dirts/oil/debris,we need to clean the carburetor regularly. And the cleaning process of honda lawn mower is somewhat simple but can be also tricky at the same time. You just need to follow some simple steps, which will ease the process.
But at first, we will need the tools and materials mentioned below:
- Screwdriver set
- Adjustable Wrench
- Carburetor cleaner spray
- Thin metal wires of various radius
After arranging these things, we can opt for the cleaning
process:
Steps To Follow
Step 1:
You need to be sure if the carburetor is the one really failing here or not. For this reason, you need to check initially if the mower has enough gas in it or if the ignition switch is turned on or not and similar cases like these. Finally, if the carburetor is found out to be faulty, then you can proceed to the next steps.
Step 2:
Power off the lawn mower and wait for the engine to cool down completely.You also need to make sure that you are in a well ventilated area. That’s because toxic gas can emit from the carburetor which might be harmful for your health.
Step 3:
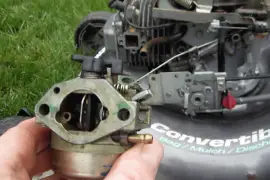
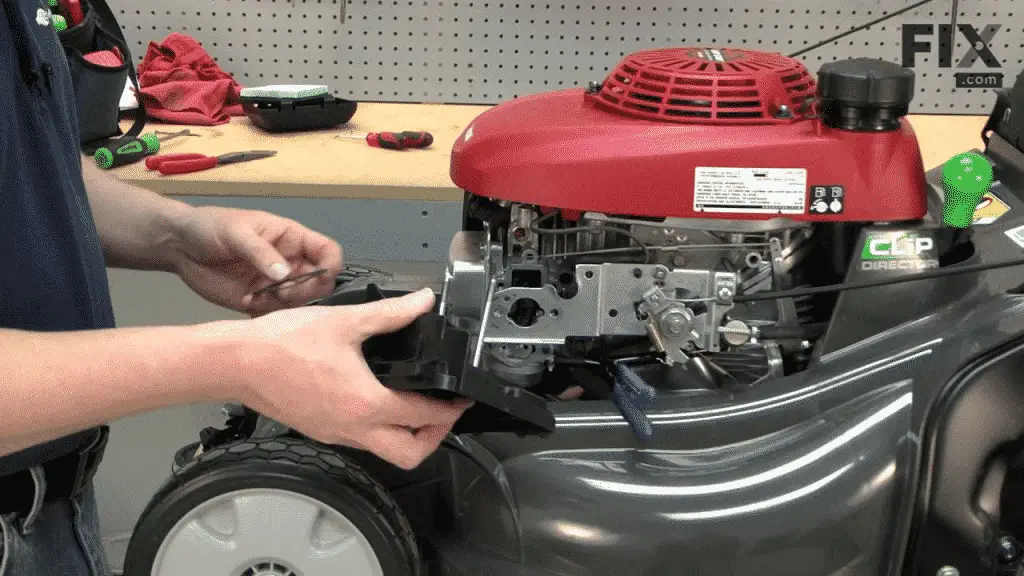
After that, take off the outer casing and as well as the air filter. Then,you will see the carburetor. In a honda lawn mower, you will see 4 bolts connecting the carburetor to the engine. Get those connected bolts off to take out the carburetor.
Also,put a pair of vise grips on the fuel line so that it won’t leak and therefore start taking it apart. You may see some oil spilling out.Take this as a good sign.
But if there’s no oil spillage, then it means that oil has clogged inside and might have caused fuel line blockage. The fuel line needs to be checked thoroughly in this case.
Step 4:
Clean the complete exterior of the carburetor with a carburetor cleaner and then take off the bowl and gasket by removing the bolt that holds them together. Look for dirt/oil/trash in it and remove them. The bowl needs to be replaced if it is damaged or the dirt couldn’t be removed.
Step 5:
After the interior is exposed, you will find a jet. You will also get a nozzle in there. You need to take these both too. The nozzle is the main part that needs to be cleaned.
You will find some holes in it. The previous mentioned metal wires will now come to play. Clean the holes by inserting the wires through the holes and rotate them rigorously in order to clean them.
Make sure that you can see through the holes which means they are clean enough. For extra caution, you can spray the gaseous cleaner spray through the nozzle holes as well as the other parts.
Step 6:
It is a good practice to replace the gasket if it becomes old because running with an old one may create frequent problems. After following the above steps, put back all the parts and re-assemble the entire carburetor. Make sure the fuel tubes are connected like their previous positions too.
The entire process may seem to be quite difficult at first. But trust me, it’s super easy if you just focus a bit. What’s even more fascinating is that it takes hardly more than 20-30 minutes to complete the overall work.
Cautions:
- Don’t forget to remove the wires from the spark plug before starting the cleaning process.
- Make sure you don’t temper with any springs, links that might result in the change of governed speed of the engine of the lawn mower.
- The equipment covering for exposed parts should be put back to their original places.
- Cleaning process should be done in a well-ventilated area.
When it is necessary to clean the Carburetor on a lawn mower :
- When the lawn mower won’t start.
- When the mower is making abnormal/weird sounds.
- When fuel from the engine floods or overflows.
Final verdict:
The cleaning of a Honda lawn mower might seem to be very stressful and difficult at the very first attempt, but this cleaning will solve numerous other problems associated with it. Moreover, it will save you from spending a great deal of money on maintenance and will also save from the hassle of taking the lawn mower to a servicing center.