A push mower blade needs to be changed after an extended period of use. You will start to see symptoms when a mower’s blade becomes dull, such as uneven cuts, bare patches, and a few more that we will outline in this article.
Also, there can be sudden damage, like the blade getting bent.
When you feel the need to change a blade, you need to make sure you are well aware of the whole process. Otherwise, there can be complications.
This article will explain how to change a push mower blade.
In this content you’ll learn:
How To Change A Push Mower Blade: A Complete Guideline
Going through a few simple steps, you can easily change your push mower blade. But before we outline the process, let’s understand why you should change the push mower blade.
Why Do You Need To Change A Push Mower Blade?
The answer is simple, because of damage to the blade. The longevity of the mower blade depends on the condition of the surface you will be using it on. For instance, the blade will quickly become dull if you use the mower on a rocky and tough soil surface.
Grass does not cause that much damage to the blade. Despite this, the stones and other solid substances are the culprits here.
When the blade is damaged, it will leave an uneven cut, patches, and eyesores (something that looks unpleasant to our eyes) on your lawn. Additionally, a damaged blade puts extra stress on the mower’s engine.
So, you are not using the lawn mower efficiently if you have a faulty blade. It results in more fuel consumption. Change the blade occasionally to avoid these complications.
Now, let us see the method for changing a blade.
What’s the process for changing a Push Mower Blade?
Before getting started with the process, gather the following items:
- A pair of Heavy Work Gloves
- A Combination Wrench
- A Bowl, for draining the fuel tank
- A Clamp
- A Replacement Mower Blade
- Optionally, a screws tray
It is best to take a picture of the whole installation if you feel that you may forget, how it was originally assembled.
Whether you want to replace or remove the blade for sharpening, the process is as follows:
Step 1: Turn the mower off, Disconnect the Spark Plug, and Drain the Fuel Tank
First, turn the mower off and the first thing you must do is remove the spark plug. This ensures that the mower will not accidentally start during the process.
Now turn the push mower on its side and drain the fuel from the tank. This is for avoiding any fuel spillage during the changing procedure. After draining, close the lid properly.
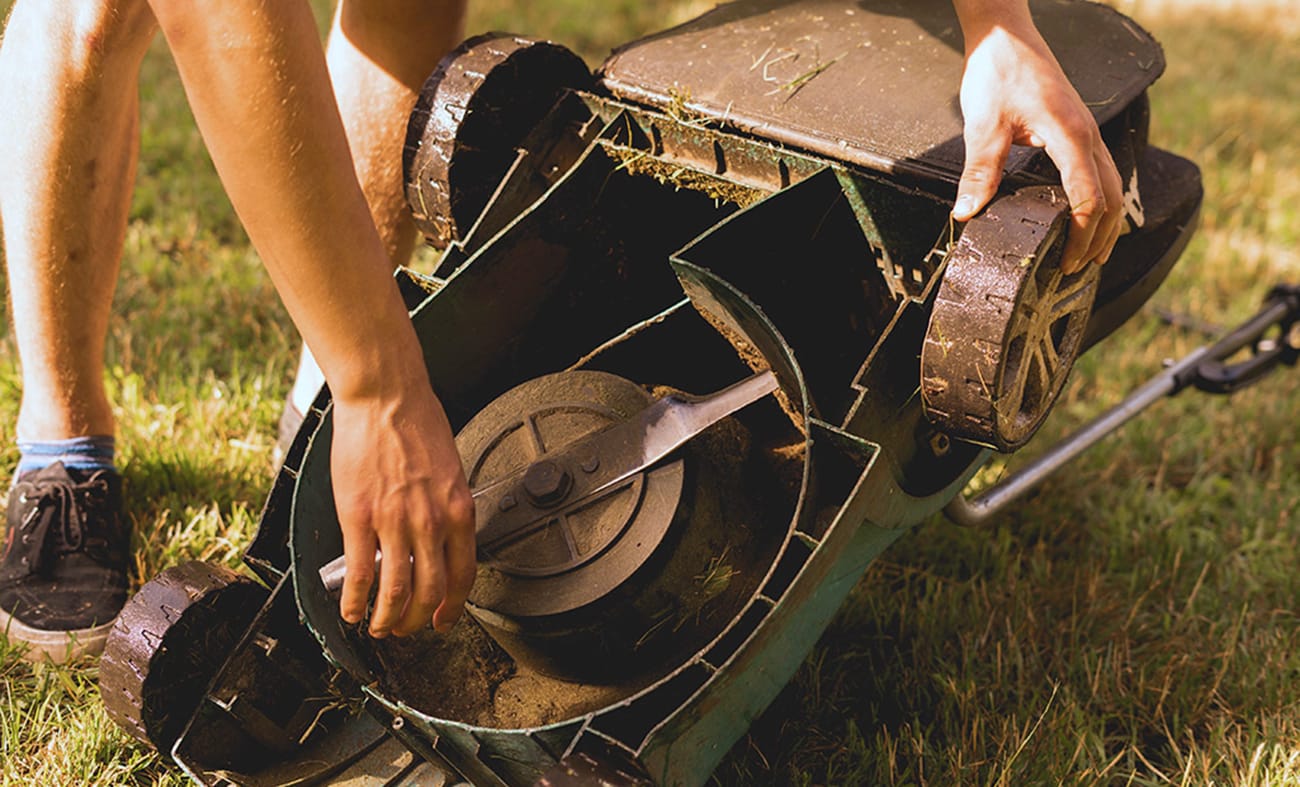
Step 2: Get to the Bottom
Put on the heavy work gloves and look at the bottom of the mower. If you are doing the procedure on a working table, you can easily place it upside down. If you are working on a floor, lie the mower sideways to access the underside.
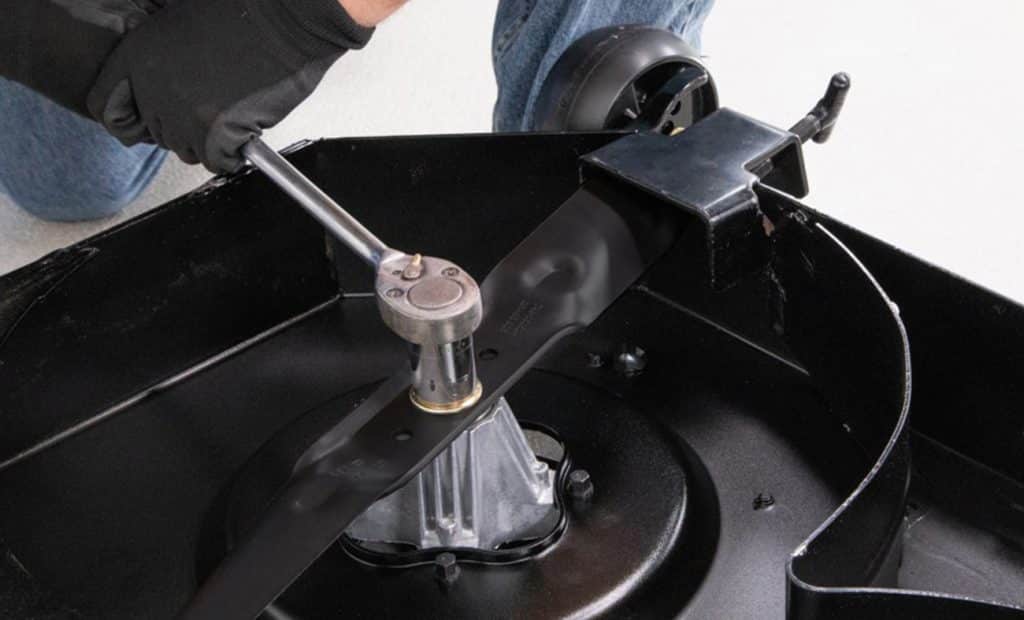
Step 3: Remove the Mower Blade’s Fasteners
The fasteners on the mower’s blade can vary depending on the manufacturer. Generally, there will be one or two bolts. Take the wrench and loosen them up.
The blade may rotate when you start turning the bolts. For this, put a clamp tightly on the rotational path of the blade to stop the turning.
For the extra components rather than the bolts, remember their placement.
Secure the bolts somewhere safe, such as in a tray, before removing the blade.
Step 4: Remove the Old Blade
Remove the old blade and set it aside. Secure it somewhere where you will not step on it. To avoid the wrong installation of the blade, remember which portion was up and which one was down.
Step 5: Put on the new Blade
Now take the replacement blade and place it in the correct position. Loosely place the bolts to keep the blade where it is. After that, put a clamp tightly on the rotational path of the blade, like before.
Now start tightening up the screws until there are zero wobbles of the blade.
So, you are done at this moment. You have to make a thorough inspection to ensure that every component is in its respective place.
Step 6: Refill and Quick Check
When you have done the process correctly, there should not be any complications.
Now refill the tank with fuel. Re-attach the spark plug connection. Start the mower and run a quick check by mowing some grass.
Mistakes to avoid
Certain things can go wrong. So, it will be best if you are well aware of them.
Blade Type
The blade type depends on the manufacturer. So, before purchasing a blade, check the manufacturer’s user guide to determine the type or model of the blade.
You will not get a universal blade model for all of the mowers out there.
Blade Direction
Blade direction is really important; otherwise, the mower will not work correctly. Make sure you are placing the blade in the right direction.
Removing the Spark Plug Connection
This is the crucial step when changing a mower’s blade. If you do not disconnect the spark plug wire, the engine may start while you have your hand on the blade. This can cause severe damage to your hand.
Final Words
So, now you know how easily you can change a push mower’s blade.
We all hope for a gorgeous aesthetic and a smoother cut when mowing our lawns. If you want to achieve that, the mower blade should be healthy.
Regularly check the blade and replace it when needed.