Whether you are a gardener or a homeowner, a lawnmower is a must to keep your lawn looking nice, and up-to-date. And hence, you are to check the oil in your lawnmower on a regular basis, just like you would in your gas-powered automobile.
Even though your lawn mower isn’t a car, you still need to replace and check the oil every now and then. Because your lawnmower consumes oil much faster than your car. This happens especially if the grass is moist or tall and when the dirt, agitated air, and heat enter into the crankcase, metal cast housing that protects an engine’s crankshaft).
So, the question may arise, how to check oil in a lawn mower? Well, to know in detail, stay tuned with the article till the end.
Let’s get started.
In this content you’ll learn:
How To Check Oil In A Lawn Mower
If you frequently check the oil, it will keep the lawnmower operating smoothly. However, you have to follow different methods for mowing without a dipstick and mowing with a dipstick.
Let’s learn in a step-by-step process on how to check oil in a lawn mower.
Method Of Checking The Level Of Oil With The Dipstick


Follow the given procedures step-by-step for the mower accompanied with the dipstick.
Put Down The Mower
If the mower is hot, put aside the lawnmower on something like an open level surface. Otherwise, you can begin your mower immediately if it is cold.
However, if your lawnmower is already running, turn it off and let it come to room temperature. Allow the mower to cool for a minimum of 10 minutes. That’s because precise readings can be obtained if you check the oil with the cool engine.
Find The Fill Cap
Usually, you find the oil fill cap on the crankcase. However, its location varies depending on the type and model of lawnmower. The latest models make it easy to find the oil fill cap as they have an “oil” or “fill” label along with the cap location.
A longer oil fill pipeline with a fill cap and a dipstick is available on some engine types. Those who own a miniature lawn tractor can easily locate the oil fill cap by lifting the hood only. Proceed to the following step after you’ve found the oil fill cap.
Wipe The Crankcase And The Cap
After finding the oil fill cap, the next task is to cleanse the external surface all over the oil fill cap. It’s done mainly because debris and dirt might get piled up in this region when incorporating the mower.
However, dirt and dust will tumble into the crankcase and pollute the oil if you do not wipe this region before replacing the lid. The accumulation of dirt inside the crankcase can block oil lines, causing the moving parts to lose lubrication.
Therefore, you should take a clean wipe to scrub this area.
A good strategy is to dampen one edge of the fabric with water and wipe the area with that wet edge. Afterward, with the dry part, repeat the cleaning process.
When you are done with the cleaning, gently detach the cap by rotating it counterclockwise. The dipstick is linked to the cap’s internal surface.
Examine The Oil Level
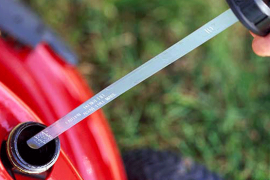
Wipe the dipstick with the rag you employed previously. Afterward, reinstall the dipstick and tighten the lid completely (if it’s a screw-in kind). Leave the dipstick to rest inside for a few moments.
After that, pick it out once more. A tiny coating of oil sticks to the dipstick provides for visual examination.
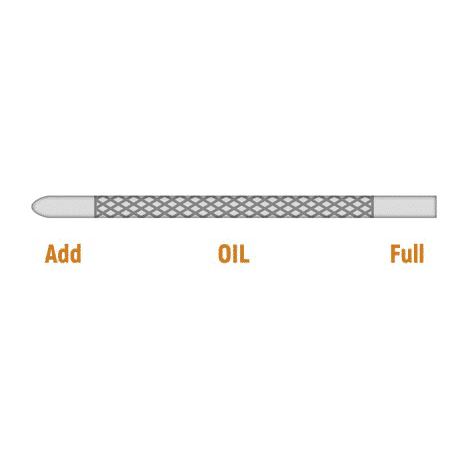
Dipsticks are frequently marked with a maximum and minimum symbol. For example, the maximum section is usually labeled with the term “full” or “add”.
The oil line should never exceed the maximum setting. If the oil level is reduced, you should top it up and check again.
Don’t pour too much oil in one go or you’ll have to discharge some if you overfill and that will take a while longer. Therefore, with every pour, you should spill in small amounts of oil along with checking the dipstick. But remember to keep the dipstick clean before every check.
Further, the ideal oil level will be somewhere in the middle of the range, but nearer to the maximum layer. The product’s guidebook is the best source of information in this area.
Set The Cap Back On
Set the cap back on and tighten it clockwise once you’ve validated that the crankcase oil level is in an inappropriate state. After completing this step, your mower is suitable to use.
Ideally, checking the oil every time you mow would be the recommended approach. By following this procedure, you’ll always be aware of the level of oil in your mower. Also, it’ll never run out of oil easily.
Method Of Checking The Level Of Oil Without The Dipstick
Follow the given steps if your mower doesn’t come with a dipstick.
Clean The Oil Fill Cap
Using a clean rag, polish the area surrounding the oil fill entry cap. This way the oil won’t be contaminated.
Remove The Cap
Push the tip of a screwdriver in the middle of the two-button straps on the fill cap. Detach the cap from the fill aperture by turning it counterclockwise using the screwdriver.


Examine The Level Of Oil
After you’ve detached the cap, check inside the fill hole for the slot labeled on the inside. The level of oil should be close to this slot or on the tip of it.
However, if the oil levels get too low, top it up until it reaches the slot. Then put the cap again and tighten it clockwise till it is secured.
Why Is Checking Oil Level Necessary?
Engine oil supplies a variety of purposes. It reduces overheating by keeping the engine chilled. It also prevents wear and tear on engine parts by lubricating them. Let’s explore each in more detail.
Overheating
Overheating causes problems in the engine component, such as warping, displacement, swell, and even cracking. Your lawnmower will overheat if there isn’t enough oil in it, resulting in irreversible damage.
Lubrication
If there is insufficient oil for lubrication, abrasion, or scraping away between the parts increases. As a result, it lessens the engine’s life expectancy as well as performance. Also, in some instances, a lack of lubrication might break the engine completely.
Too Much Oil
Always bear in mind that, shortage of oil is bad but excessive oil is even worse. The engine won’t start easily if it contains too much oil. When there is excessive oil in the crankcase, it becomes aerated, or overflowed and loses its ability to lubricate and cool.
Conclusion
Finally, we are at the edge of this article. To make the lawnmower engine run longer, it’s important to check the oil frequently. I hope you finally got the idea of how to check oil in a lawn mower.
However, to get the best performance, you should check and change the engine oil as well as the oil filter of your lawnmower as part of regular maintenance. Following the maintenance timeline will guarantee that the machine’s engine runs smoothly and efficiently, extending its service life.
It is preferable not to be bothered about exact amounts when it comes to the oil level. All you have to do is maintain the amount between the minimum and maximum settings.
