The saying goes “if you take good care of your belongings they will last longer,” well, in this case, if you maintain your lawn mower properly, it can last for many years.
Has your lawn mower been struggling to get started? Well, the problem could be with the spark plug, especially if it’s outdated or unclean, as something could be blocking the spark from igniting.
So, how to clean a lawn mower’s spark plug? The task is actually quite simple and easy.
We’ll provide everything you need to know below.
In this content you’ll learn:
How To Clean a Lawn Mower Spark Plug: Step-By-Step Process
Since spark plugs are fundamental to operating an engine, it’s vital to keep it clean and in good condition.
Therefore, let’s thoroughly outline the cleaning process.
Why Is It Necessary To Clean The Spark Plug?
The condition of the spark plug is the first step in keeping your lawn mower consistent and performing at its best.
The most crucial function of a spark plug in your machine is to generate an electrical spark. It burns gasoline and air in the fuel tank of your engine, forcing the pistons to fluctuate. The spinning function of the mower depends on the piston sliding up and down. Therefore, the spark produced by the spark plug is an important step, and so, evidently, it all starts here.
Why Does The Spark Plug Get Dirty?
Spark plugs stop working properly if they get dirty, which is referred to as “fouling”. Your engine will lack power, consume more fuel, not run consistently, or perhaps stop running altogether if the spark plug is fouling.
Let’s focus on the main causes of fouling and what to look for.
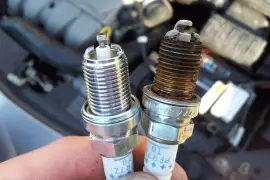
Carbon fouled
A plug gets carbon fouled when a significant amount of soft and dry carbon deposits onto the electrodes and insulator nose, which is the hottest part of the spark plug. As a result, it causes electrical leakage and misfire.
Not only that, but carbon fouling also causes things such as: blocked air filters, rich fuel mixtures, malfunctioning ignition systems, and inconsistent ignition timing.
Oil fouled
Oil fouling causes black, wet, and greasy carbon deposits on the electrode and insulator nose. It also causes the engine to misfire, as excessive oil enters the combustion chamber. This can occur as a result of a high oil level, damaged piston rings, or broken valve guides.
Overheat
Overheating can also cause spark plugs to get dirty. As a result, a white glaze or shiny insulator will form on the spark plug when it’s overheating. This happens due to a melted electrode. Also, a slight black coating will gather over the insulator nose. The electrodes can also get prematurely worn out because of this.
Overheating can cause several other issues, including lean fuel blending, manifold air leak, inadequate fuel octane rotation, early ignition timing, and inadequate cooling.
Ash formation
Another cause of fouling is when a dense layer of ash forms on the firing edge of the spark plug, this gradually results in a misfire. Sometimes these layers of ash make the temperature rise too high and this leads to pre-ignition.
This formation of layered ash is predominantly produced from the burning of low-quality fuel, oil, fuel additives, and engine state.
Cleaning The Lawn Mower Spark Plug
Now that we know how spark plugs get dirty, let’s look at how to clean them because only proper maintenance will prolong their function.
Here we’ll outline the steps for accurately cleaning the lawn mower spark plug:
- Locate the spark plug
Trace the spark plug cables to the crankcase apertures where they are attached to the spark plugs. The crankcase is a drilled metal structure that holds several components, the most important one is the crankshaft.
The primary purpose of the crankcase is to protect the connecting rods and crankshaft from dust. If you have any difficulty locating the spark plugs, have a look at the user manual provided by the manufacturer.
- Blow the scraps away
Once you’ve found the spark plugs, clean the area to prevent any debris from entering the cylinders. It’s important to take care while doing this, especially when removing the spark plugs. If there is any leftover debris or dirt in the cylinder while removing the spark plugs, the engine can actually be severely damaged, so use an air compressor to safely remove all loose items. Also, always use eye protection when spraying the debris away with an aerosol can.
- Remove the spark plug
After locating the spark plug and following the safety measures, you can now remove them. Cleaning the spark plug is impossible if it’s still connected to the lawn mower.
The majority of lawn mowers have only one spark plug to deal with, however some models have multiple. If this is the case, remove and wipe each spark plug individually, as they are installed in a precise order.
The spark plug is typically visible from the outside for most models. However, when it is a riding lawn mower, the spark plug is not visible from the outside. For this specific kind, you’ll have to raise the hood, like you would on a car.
Once you’ve found the black cables linked to the spark plug, gently remove them. Use a wrench and rotate the spark plug to the left. If the spark plug is extremely dusty and stubborn, you need to use pliers to provide enough pressure to release it.
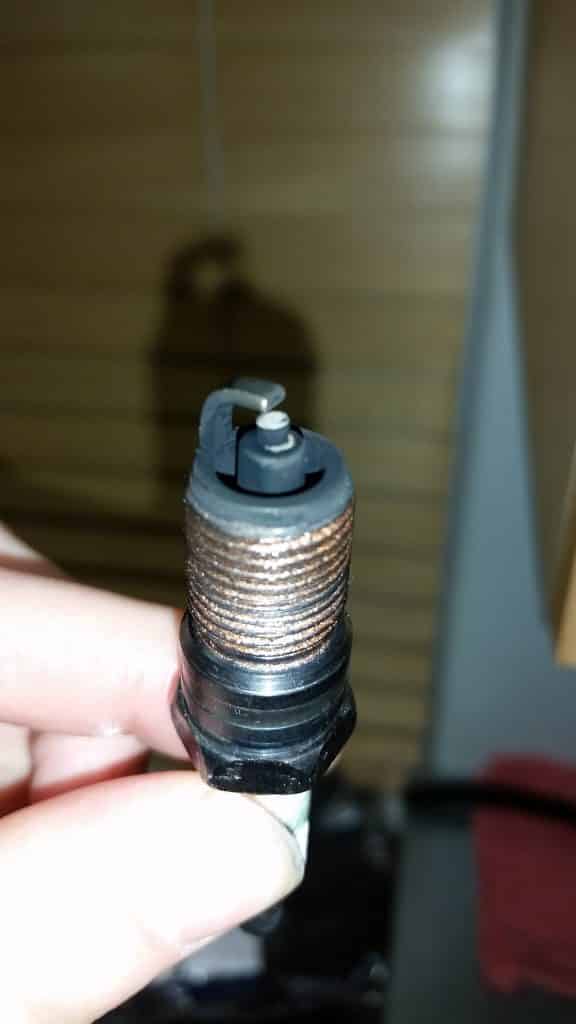
- Incorporate the grit sandpaper
Now that you’ve removed the spark plug, look for a compact metal piece found at the bottom of the spark plug. This is called the electrode. If it’s discolored or black, brush it with the sandpaper back and forth to remove the dirt. Follow this process until you find a clean metal on both sides.
- File down the dirt on the electrode
If the sandpaper doesn’t do any good for you, you should change the spark plug. On the other hand, if you’re in a hurry, you can use a small-sized, steel file to scrape away large carbon layers on the electrode.
Push the file into the space between the electrode and the plug to wipe down the metal. After that, brush the electrode back and forth.
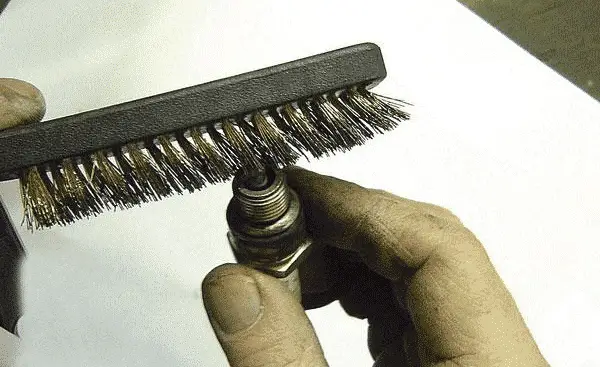
- Scrub the threads
There’s a considerable chance that oil and filth have built up in the wires of your spark plug, which makes reinstallation harder. Thus, be sure to wipe off any oil.
In order to clean the built-up junk, use a wire brush and scrub the threads. Brush the threads at a vertical angle to the plug, then change to another angle and scrape it for maximum efficiency.
- Spray the brake cleaner
You can also remove the piled-up filth from your spark plug with a brake cleaner. This can be found in spray cans at your nearest auto parts store. It is also useful for cleaning dirt from a variety of car parts.
In addition to cleaning, the brake cleaner evaporates quickly, which allows the parts to dry faster. You can use the brake cleaner by spraying it on the plug and threads. Once this is done, scrub away any leftover dirt or debris using a clean rag.
Verdict
Finally, we hope you have found the necessary information on the importance of spark plugs, the reasons behind their pollution, and how to clean lawn mower spark plugs.
So, to make your lawn mower perform at its best, you need to maintain the heart of the engine properly, which is none other than the spark plug. Therefore, do check them frequently.
Great! Now if I knew where to find the PTO? Or maybe the throttle?
Great article ! You should include the Cub Cadet push button “magnetic” key in your next revised edition of this article.
This special starting function is included when you buy a Cub Cadet riding mower with the EFI engine. Owners of this machine have had problems with this starting key, including me. If you write and describe this key, please include a short theory about how it works. Thank You.
So, you don’t need to use the button under the hour meter when starting? What is it used for?