Do you want to repair your lawnmower? You know repairing a lawnmower is not a difficult task if you just have patience and a proper guideline. And of course, without proper guidelines, it’s actually a troublesome task.
You won’t be needed to repair the entire lawnmower at a time. Rather gradually repairing every part helps you to give the mower its older strength.
I guess you don’t have any idea how to repair lawnmowers. If so, then you are in the right place!

Yes, in this article, you will get the proper guidelines in this regard. Just keep patience because a lawnmower consists of numerous parts. We will try to cover all the things that will be helpful to repair important parts of your mower.
So, without delay, let’s start.
In this content you’ll learn:
The Process To Repair A Lawnmower
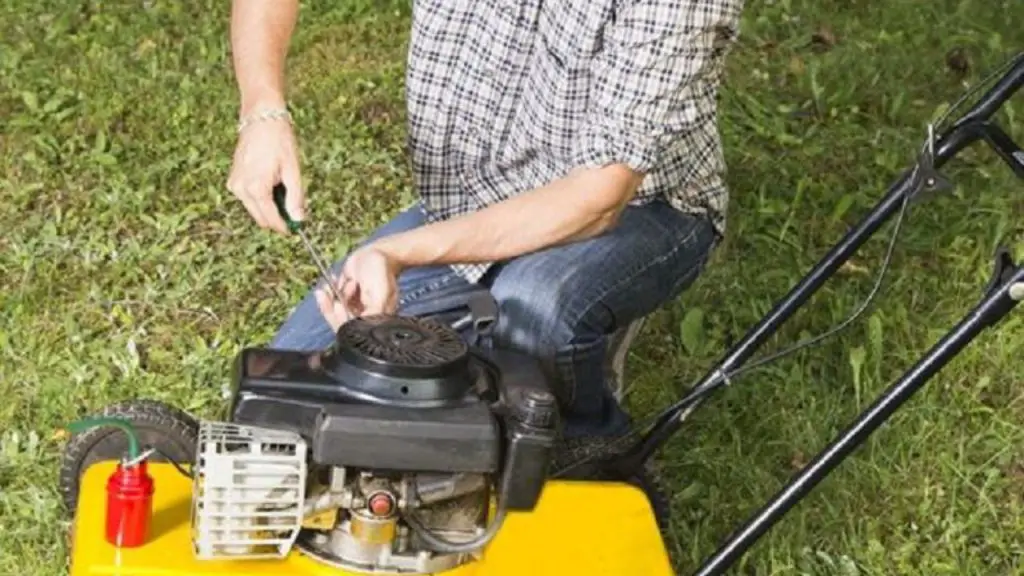
Before repairing the mower, you need to identify where really the problem occurs. And when you will become ascertained about the problem, it will actually become easier for you to repair.
Basically you know repairing a lawnmower means repairing the parts of the lawnmower. So let’s take a look at the parts where people face the most problems and how these can be repaired.
1. The engine of the mower
When the engine doesn’t respond properly, it’s really a tough task to start the mower. You know the engine of the mower is the only power source to start the mower.
All the other parts supply adequate power to the engine and finally, the engine works to start the mower.
To know how to repair the engine of the mower, follow the steps stated below. You will also get some additional information about the repairing process of the mower.
Steps to follow:
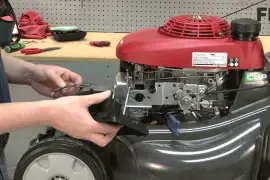
Step #1: Disconnect The Spark Plug
Before doing any repair, don’t forget to wear safety clothing and disconnect the power cable or spark plug from the mower. It will save you from being electrified and any unwanted injury.
Step #2: Check The Spark Plug
After disconnecting the spark plug, diagnose the condition of the spark plug. If it is melted or damaged then replace the plug.
Step #3: Check The Ignition System
Test the ignition system. You can easily test it before disconnecting the spark plug. Just start the mower and notice the ignition system. If you see any spark when starting the mower, then the ignition system is in good condition. Otherwise, you have to replace it.
Step #4: Remove The Flywheel
Remove the flywheel now. It’s become a hard task if you don’t know how to remove it. It’s a little bit of a tricky process. First, locate the crankshaft and block the rotation. Use a wrench to remove the nut of the blade and keep it in a safe place.
Now, use a crowbar to lift the flywheel and keep the wheel as well as the key of the wheel in a safe place for reinstallation.
Step #5: Check and Clean The Mower Carburetor
Clean the carburetor properly as it acts as the main culprit of the engine problem. The jets of the carburetor become clogged due to long time use. Use small pieces of brass wire to clean it.
Step #6: Clean The Fuel Tank and Gas Cap
Clean the fuel tank and the gas cap if the engine starts trouble. Use a little brush to clean the lines, gas cap, and primer bulb. Clean all things properly to remain the normal flow of the gas towards the engine.
Step #7: Use Exhaust Valve Cleaner
If you have a four-stroke mower engine, you will have a 2 exhaust valve in the engine. Use a commercial exhaust valve cleaner to clean those. These valves should remain dust-free if you want to run the engine flawlessly. And after cleaning the valves, replace those in their previous position.
Step #8: Clean The Spark Arrestor
Use a wire brush to clean the spark arrestor of the mower engine. Though it is not an important part of the engine, cleaning it also helps you to run the engine accurately.
Step #9: Check The Piston and Cylinder Wall
Now remove the piston of the mower engine and separate the halves. We don’t recommend you separate it because if you separate the halves, then the crankshaft will be totally disconnected from the piston of the engine.
Check the piston and the cylinder wall whether there is any leakage or scratch in those parts. If so, then replacing those parts will be the best decision.
That’s all for repairing the mower engine. Reinstall all the parts following the reverse process.
2. The pull cord
The pull cord is really a vital part to start the mower. You can’t start the mower whether the pull cord is torn or damaged.
Check the flywheel of the engine first. Check out the brake of the flywheel whether it is engaged against the mower handle when you pull the cord. When the flywheel is properly working, then check the mower blade.
When the grass clippings make a cake-like layer underneath the mower, the blade becomes stuck. That’s why the pull cord becomes hard and doesn’t work properly.
So clean the bottom of the mower carefully. Replace the pull cord if you feel the cord is problematic.
3. The air filter
When the air filter is dirty, it creates difficulties in the time of starting the mower. To clean the air filter, locate the filter at first. Bring out the filter from the air filter compartment and clean it. We recommend you to replace it because the price of the air filter is not so high.
4. The blade of the mower
Sharp the blade whether it becomes damaged or blunt. A damager or blunt blade can’t work properly and take too much time to mow the lawn. Remove it carefully and sharpen it by using a flat-file.
After sharpening the blade, don’t forget to balance it. Use a screwdriver to balance the mower blade.
5. The battery
The battery of the mower supplies adequate power to turn on the mower. When the battery doesn’t respond properly, it becomes a tough task to start the lawnmower. Then check the battery condition by using a multimeter.
If the battery is damaged or not charged properly, you can jump-start the mower by attaching a jumper cable with the battery. Use the car battery to jump-start the mower. When the battery is fully damaged, just replace it.
6. The drive belt
The drive belt of a lawnmower plays a significant role to move the mower forward. When the belt is torn or damaged, you need to replace it.
However, the replacing process of a drive belt is a bit difficult. We recommend you to call an expert technician to replace the drive belt.
7. Lawnmower wheel
A mower really becomes a useless machine if the wheel of the mower is damaged. With a damaged wheel, you can’t move the mower one step further.
If the tire or the tube of the wheel is completely damaged, then it is better to replace them. Just remove the wheel from the axle and replace the tire as well as the tube.
Recommendations
- Always try to use the manufacturer’s recommended parts when replacing any parts of the mower.
- Check the oil level regularly before operating the mower. Change it if needed.
- Do not overcharge the battery. It will damage the battery in the shortest period of time.
- Always try to store a lawnmower in a shaded and cool place.
Cautions
- Don’t forget to wear safety clothing when you do any repair.
- Keep your kids away in time of repairing.
Final verdict
Finally, repairing a lawnmower is literally a time-consuming task. It will seem to be a troublesome task if you do this for the first time.
But repairing a mower at home really saves your bucks and increases your skills too. You know when you repair your mower regularly at home, it gradually becomes a handy task for you.
I hope this article has given you a clear concept of how to repair lawn mowers.
Go through our other articles to know in-depth about the repairing process of a lawnmower.