You should learn how to properly drain fuel from your lawn mower for various reasons. Not only is gas a combustible liquid that does much damage if mishandled, but it can also damage your lawn mower if left to stand over the winter months. So, how do you drain fuel from a lawn mower?
To drain fuel from a lawn mower, follow universal safety precautions, access the fuel tank, and drain the fuel into a container with a traditional siphon or length of tubing.
In this content you’ll learn:
Terms To Know (With Pictures)
Here’s a list of all the terms you’ll need to know to understand this guide best:
Siphon
A siphon is a tube to draw a liquid from an elevated container to a lower one.

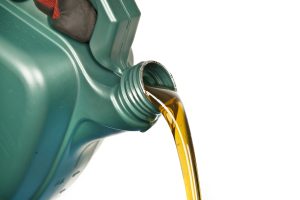
Viscosity (Viscous)
Viscosity is how thick a liquid is, which determines how well it flows (water has low viscosity, and molasses has high viscosity).

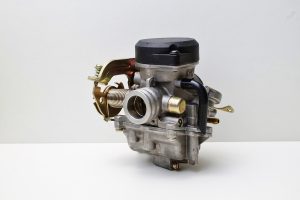
Carburetor
Carburetors create and adjust the fuel-to-air ratio for gas-powered lawn mowers.

Why Drain Fuel From Your Lawn Mower?
Your lawn mower’s manual may provide different instructions for winterizing your lawn mower than we are about to advise, so check your manual before following the procedures below.
The reason behind draining fuel is that gas degrades over time. Most fuel starts to deteriorate in as little as 2-4 weeks. While this may not affect your lawn mower engine during the summer, it can have dire consequences over the winter.
As fuel goes bad, it becomes sticky and more viscous. When it does, the fine jets in your carburetor become clogged with the sticky fuel and will require cleaning before they work correctly again.
Degraded fuel introduces water into the engine’s metal parts, especially if it contains ethanol, resulting in rust. Over time, the rust will reduce the lifespan of your lawn mower.
Other parts of your lawn mower engine are also at risk if fuel remains in the tank for extended periods. As the fuel breaks down, it releases chemical compounds that attack rubber and plastic components, such as fuel lines and carburetor bowls. These issues can lead to these parts failing sooner than they should.
When you try to start the lawn mower for the first time in summer, it will fail to run or run very poorly. You will then have to spend extra money fixing and replacing damaged components.
Step-By-Step Guide: Draining Fuel From a Lawn Mower

While the below can seem daunting, draining fuel from your lawn mower is relatively simple. There are several steps, but take them one at a time, and you’ll have completed the operation before you know it.
1. Follow Proper Setup And Safety Precautions
First, take your lawn mower outdoors or make sure you have a well-ventilated area to work in. Set the lawn mower on a flat, level surface. If you set it on a workbench or other raised surface, chock the wheels so your lawn mower doesn’t move backward or forward.
Before working on your lawn mower, remove the HT lead from the spark plug (and consider inspecting your spark plug as well). It’s the thick black cable attached to the front or side of your lawn mower. With it removed, there is no chance the engine will start unexpectedly and cause an injury.
Also, ensure there are no nearby flames before you start, and consult your manual before performing any maintenance.
2. Gather The Tools And Materials You Need To Drain The Fuel
You need minimal tools to empty your fuel tank. The job is significantly easier if you purchase a siphon pump, though.
Thankfully, siphon pumps are relatively inexpensive. Manual pumps are an option, or you can purchase 12-volt ones. You can even get battery-operated siphon pumps.
You’ll need the following:
- Fire extinguisher (in the event of a fire emergency)
- Eye protection
- Safety gloves
- Pair of pliers
- Flat screwdriver
- Philips/Star screwdriver
- Large funnel (this prevents unwanted contaminants from getting into your fuel)
- Rags (in the event of spills)
- Siphon
- Fuel can
- Baster or pipette
- Wheel chocks (if lawn mower is on a workbench or other raised surface)
- Length of tubing
- A block of wood or stack of magazines (for tilting a lawn mower to get all the fuel out – see more in step three in the next section)
3. Access Your Lawn Mower’s Fuel Tank
The fuel tank on a push lawn mower is usually on the side or rear of the engine. You can identify it quickly, as the cap on top of the fuel tank is relatively large. Fuel caps are 1-1½ inches in diameter. Removing them means rotating them counterclockwise, revealing a pipe leading to the fuel tank.
Riding and standing lawn mowers have gas tank filler caps behind or under some models’ seats. Most of the recent models’ fuel tanks and filler caps are to the left or right of the controls, just ahead of the driving position.
A symbol and a warning to only use a specific fuel, such as unleaded, usually also mark the fuel cap.
4. Choose The Appropriate Method To Drain The Fuel
There are five methods to drain fuel from a lawn mower, one of which is specifically for ride-on lawn mowers.
Let’s start with using a siphon.
1. Drain Fuel With A Siphon Hose
Take one end of your siphon hose and insert it into the fuel tank. A trick for getting all the fuel out is to tip your push lawn mower’s front wheels using a block of wood or a few magazines. Any fuel left in the tank then runs to the back of the tank and is more easily removed. Don’t forget to chock the back wheels with a brick or other heavy object to prevent the lawn mower from rolling backward.
Also, don’t tilt the lawn mower so far that fuel enters the air filter, as this will damage the air filter and cause the lawn mower to run poorly when started.
Insert the other end of the siphon into a funnel set in a gas can or other suitable container. As siphons work using gravity, elevating your lawn mower on a workbench will allow you to place the container on the floor, well below the bottom of the tank. Doing this makes the siphoning process quicker and easier.
Once the fuel stops running into the container, you can remove the siphon from the tank first and allow the last fuel in the hose to drain into the gas container.
2. Siphon Minimal Fuel With A Baster/Pipette
Use a baster or pipette to draw fuel out and deposit it into your fuel container if minimal fuel remains in the tank.
Be aware that the fuel will drip from the bottom of the baster when you lift it out of the fuel tank. So, either hold a container very close to the fuel tank opening when transferring the fuel or have a cloth you can keep underneath the baster to catch any drips.
3. Disconnect The Fuel Line
As a reminder, before performing any maintenance on your lawn mower, check your manual first. Reviewing the manual is especially important with procedures such as this one.
After consulting your manual, get a container and place a rag underneath the carburetor before pulling the fuel line off. The fuel will run out quickly once you remove it. The fuel line is a thick black rubber hose that exits the bottom of the fuel tank and connects to the carburetor. Depending on your lawn mower type, you may need to remove the air filter box to reach the fuel line, which attaches to the carburetor.
You can follow the fuel line from the bottom of the fuel tank to the carburetor, and if you can’t remove it, remove the air filter (giving you a great opportunity to clean it). The air filter is usually held in place by a few screws, which you must remove before removing the airbox. If you’re in any doubt, consult your lawn mower’s manual to see exactly where the fuel line connects to the carburetor.
A clip holds the fuel line in place, which you must remove before you can pull it off. The clip will either have two little tabs you can push together by clamping with a pair of pliers or a screw holding the clamp together.
Either way, carefully loosen the clip and let it slide back down the fuel line. Ensure the clip doesn’t slide down the fuel line into the gas container. Once it’s loose, grip the pipe with your fingers and work it back away from the carburetor. Be careful not to damage the brass fitting attached to the carburetor.
Taking this opportunity to clean your fuel line is a good idea, too.
4. Drain Fuel Without A Siphon
If you don’t have a traditional siphon, you can use a length of fish tank tubing to suck the fuel out of the tank. It just needs to be long enough so you don’t end up with a mouthful of gas.
After sucking the fuel up the tubing, place the other end in a container set well below the height of the lawn mower. Gravity will pull the fuel down the pipe, and air pressure will push down on the fuel in the tank. These processes force the fuel out of the lawn mower and into your container.
5. Drain Fuel From Your Ride-On Lawn Mower
Most ride-on lawn mowers have a fuel filter connected to the fuel line. Instead of trying to remove the fuel line from the carburetor, you can locate the fuel filter (a large white plastic cylinder) and loosen the clips holding the fuel line to the filter (you can also use this opportunity to check your fuel filter).
Once loose, place the end of the fuel line in your gas container and let the fuel drain out. Be careful not to snap the fuel filter connections when pulling the fuel line off.
5. Add Fuel Stabilizer (Optional)
A fuel stabilizer helps preserve your fuel and prevent it from breaking down, and there are some great options to choose from. Follow the instructions on the can so you can preserve the fuel you’ve removed from the lawn mower.
Fuel to which you’ve added fuel stabilizer can last between 12 and 24 months.
6. Run Your Lawn Mower Until It Shuts Off
After you’ve added the optional fuel stabilizer, you have two options.
You can either store the fuel and leave your tank empty or return the stabilized fuel to the tank.
There is a difference of opinion amongst some mechanics on which method you should use when winterizing your small engine equipment. The most common way is the one we recommend, which is to store your fuel separately and leave the tank empty.
After removing all fuel, replace the fuel hose and tighten the fuel cap. Replace the spark plug lead and then start the lawn mower. Leave it to run until the engine cuts out on its own.
Your lawn mower will then have an empty tank and an empty carburetor with all the fuel safely removed from the engine.
7. An Alternative To Draining Lawn Mower Fuel: Fuel Stabilizers
Some manufacturers recommend adding fuel stabilizers to your fuel throughout the season. Fuel stabilizers or preservers are combinations of antioxidants and lubricants designed to limit evaporation and repel water. Adding these prevents fuel from degrading and creating a resin that can build up in your carburetor and other fuel system parts (meaning less of a chance you’ll need to fix a bad carburetor).
After selecting fuel rated at 87 octane or above (also known as Midgrade or Premium), add fuel stabilizer according to the manufacturer’s instructions (we recommend brands such as STA-BIL and EthanolShield, among others).
Ethanol and flex-fuel, especially E15 fuels, attract moisture, damaging your lawn mower’s engine. Over time, the water separates from the ethanol and sinks to the bottom of your fuel tank. It is best to avoid these eco-friendly fuels as they shorten the life of your equipment.
Before storing your lawn mower for the season, fill the tank to minimize water buildup, adding a manufacturer-recommended stabilizer.
How You Can Properly Dispose Of Drained Fuel
Local regulations may vary according to where you live, but you can usually only dispose of fuel in a designated container.
If you need help with disposing of your fuel, contact your local recycling center or gas station. You can also contact hazardous waste facilities for safe disposal options.
Conclusion: How To Expertly Drain Fuel From Your Lawn Mower
Draining the fuel from your lawn mower at the end of the season, before putting it away in storage, will help to maintain its performance and longevity.
Don’t neglect proper fuel-draining procedures, as they will pay you back often. A well-maintained lawn mower will cost you less and last much longer than a mistreated one.
Now, we’d like your thoughts on how to drain fuel from a lawn mower. Are you planning to put this to use right away? Do you have anything to add? Let us know in the comments below!
