In this content you’ll learn:
Key Takeaways
- A bad lawn mower spark plug causes your lawn mower to perform poorly, so you need to change it to keep your lawn mower running optimally.
- Check your lawn mower spark plug after every 25 hours of use and replace it at least once every two years.
- Replacing it means removing the old spark plug, gapping the new spark plug, carefully installing it, and testing your lawn mower.
Knowing how to diagnose and change a bad lawn mower spark plug is a skill that can save you both time and money. As a critical engine component, faulty spark plugs can cause many problems, from poor performance to hard starting and an uneven cut.
So, here’s how to diagnose and change a bad lawn mower spark plug.
How To Diagnose And Change A Bad Lawn Mower Spark Plug: Step-By-Step
You can take steps to determine if your lawn mower spark plug has gone bad.
This process starts with paying attention to how your lawn mower is running.
1 – Pay Attention To Lawn Mower Performance
A malfunctioning spark plug may lead to various lawn mower performance problems, such as:
- Difficulty starting
- Intermittent firing or misfires causing the engine to stall or splutter
- Rough idling accompanied by excessive vibration and low RPMs
- A lack of power, struggling to cut grass while feeling sluggish
- Increased fuel consumption
- Excessive black smoke due to unburned fuel being expelled
- Engine knock or pinging due to the fuel exploding at the wrong time
- In a ride-on lawn mower, poor acceleration
- An increase in fuel usage
Now that you know what to look for when your lawn mower spark plug is worn out or broken, it’s time to remove the spark plug to inspect it.
2 – Gather The Tools And Materials You’ll Need
You’ll need the following supplies:
A feeler gauge or gap tool is an instrument that allows you to measure the spark gap at the end of the spark plug.
This gap must be set to a specific size so the spark plug can produce the correct size spark. If the gap is too big, the spark won’t jump across. If it’s too small, the spark won’t be strong enough to fully ignite the fuel/air mixture.
The end of the spark plug is usually covered with soot, which you can brush off with the wire brush.
3 – Follow Proper Safety Precautions
Place your lawn mower on a level surface in your workshop or garage. Place a chock or brick behind the back wheels and in front of the front wheels to stop the lawn mower from moving about.
You can wear gloves if you wish, but they are unnecessary for removing a spark plug.
Avoid working on the lawn mower when it is hot. The spark plug attaches directly to the lawn mower engine at the hottest part of the motor. You’ll need to wait 10 to 15 minutes for the engine to cool down before touching the spark plug.
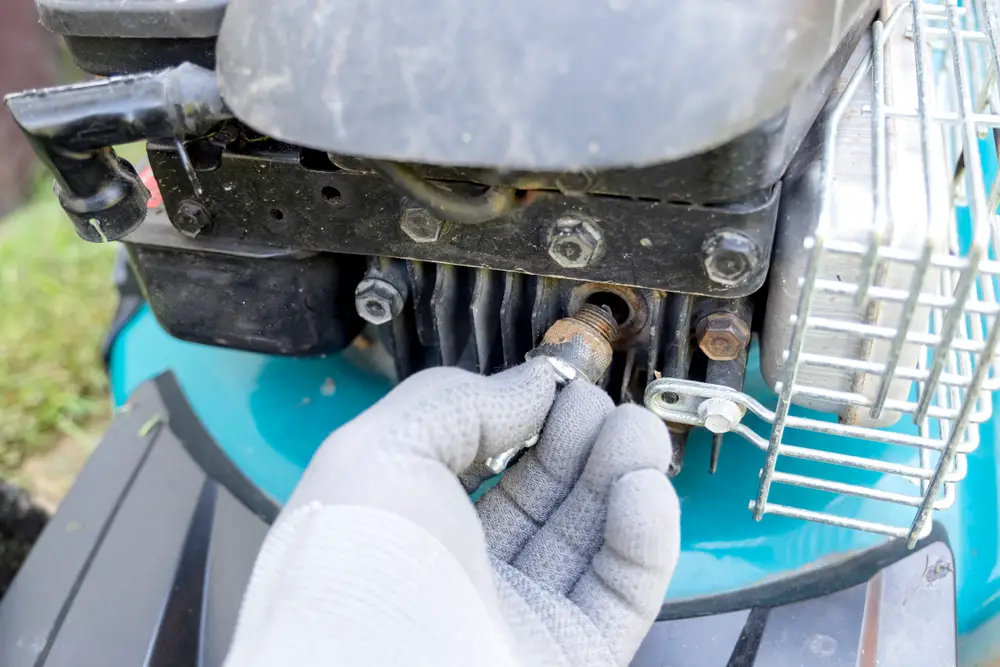
4 – Remove The Spark Plug
You can find the spark plug on the front of the lawn mower engine. You can typically identify it by the large rubber boot that covers it. The thick spark plug lead that enters the boot is easily visible, so locating the spark plug is quite easy.
If you are uncertain where the spark plug is, consult your lawn mower manual.
Remove the spark plug lead by pulling it straight off with your fingers. Place the lead to one side out of the way.
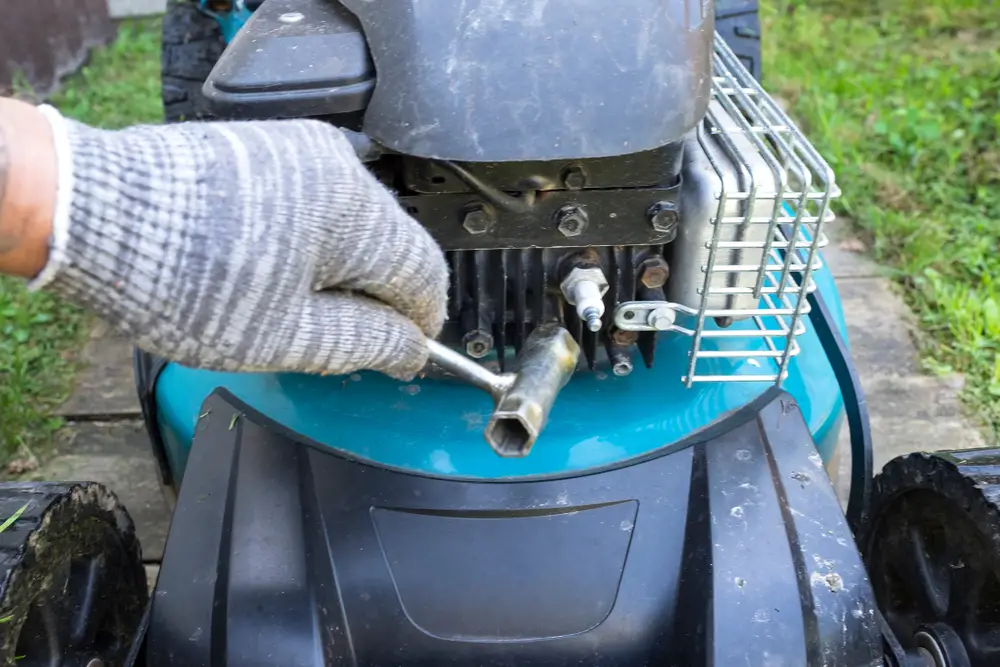
Then take the spark plug wrench and place it over the spark plug. Be careful not to apply pressure laterally on the spark plug, as you can break it in half. Keeping the spark plug wrench in a straight line with the spark plug, turn the wrench anti-clockwise to undo it.
Remove the spark plug, and be careful to check that it is not too hot to hold.
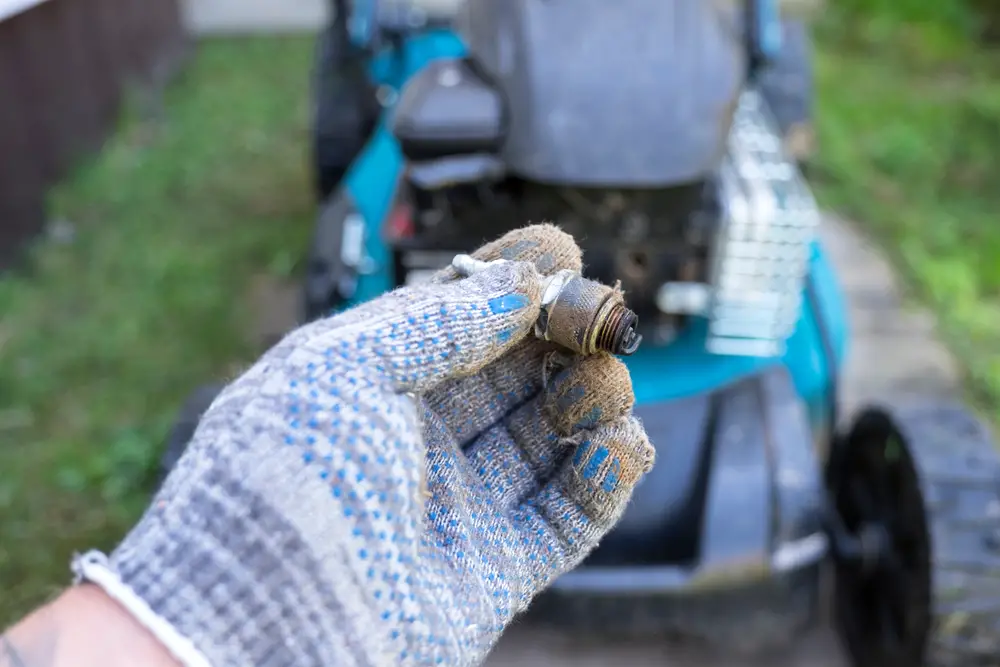
5 – Check To See If The Spark Plug Is Bad
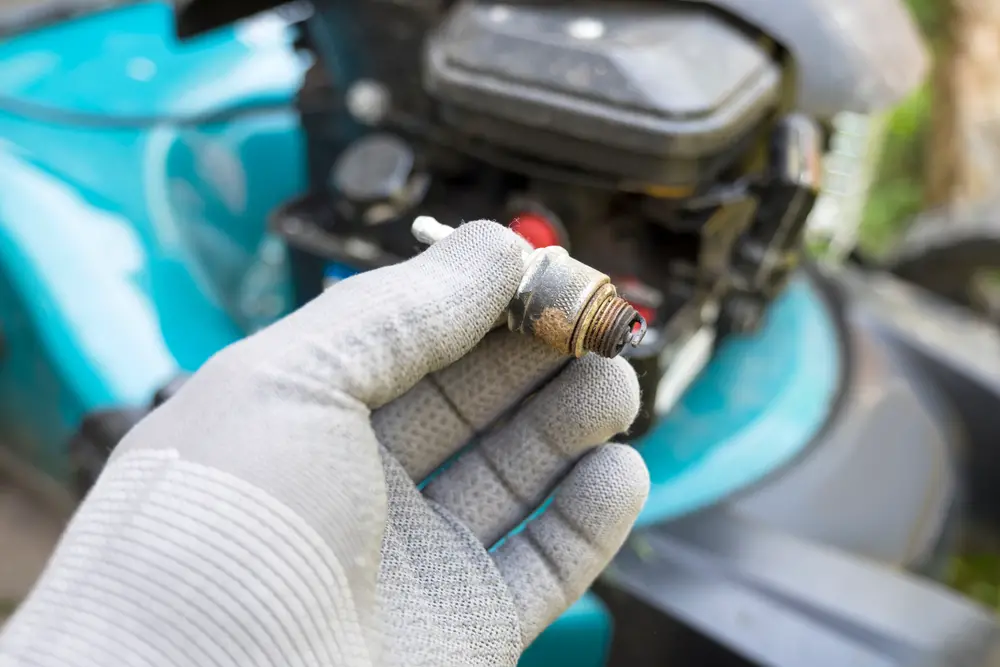
When you inspect the spark plug, you’ll notice the end inside the engine is black, gray, or brown.
Usually, the electrode where the spark plug gap is located will be pitted and covered with soot. Use the brush to remove the soot so you can inspect the electrode.
The electrode is the curved piece of metal at the end of the spark plug. It is bent over in a C-shape with a gap between the electrode’s end and the spark plug’s center.
If the electrode is badly corroded with most of the metal missing, replace the spark plug with a new one.
If the metal still looks in good condition, brush as much carbon or soot build-up off it as possible, replace it, and test your lawn mower to see if that fixed the issue. And if not, replace your spark plug.
6 – Properly Set The New Spark Plug’s Gap
After inspecting the spark plug to confirm it is bad, remove the new spark plug.
Insert the electrode into the gap tool at the smallest side (normally .020 inches) and slide the spark plug around it until it cannot go further. Read off the gap size in line with the electrode, ensuring it matches the gap specified in the manual.
The normal gap on a standard spark plug is 0.030 inches.
If the gap is too big, you can lightly tap the end of the spark plug on the engine or other metal surface. This will close the gap slightly so that you can re-test it. If the gap is too narrow, use the gap tool as a wedge and lever the end of the spark plug so that the gap opens a bit.
7 – Install The New Spark Plug
Once the spark plug is correctly gapped, there are two steps to installing a spark plug.
The first is using your hand.
Use Your Hand
Insert the spark plug into the engine and carefully thread it clockwise, using only finger pressure.
Threading the spark plug means carefully aligning the spark plug threads with the threads in the spark plug hole in the engine. When the threads are aligned, the spark plug will turn easily. If the threads are out of alignment, the spark plug will be challenging to turn.
If, at first, the thread does not engage properly, turn the spark plug back until you feel the thread seat in the thread, then you can turn it clockwise. As the spark plug thread seats, you’ll feel the spark plug click down a fraction into the hole. The movement is very small, but you will feel it through your fingertips if you are expecting it.
If you cannot get your finger far enough into the lawn mower to twist the spark plug, insert it into the end of the wrench first, then use the wrench to position the spark plug in the hole.
This is important, as using the tool to insert the spark plug can lead to you cross-threading the spark plug, which will lead to a costly repair – so be gentle.
Cross-threading occurs when you don’t line up the thread in the engine with the thread on the spark plug. The thread on the spark plug then cuts into the thread inside the engine, causing it to lock up and damage the thread, so you cannot screw the spark properly in place.
Use Your Spark Plug Wrench
Once the spark plug is turning easily in the engine thread, place the spark plug wrench over the spark plug and carefully screw the spark plug in.
When you feel the spark has reached the end of the thread and stops turning easily, give it a firm twist to lock it in place.
You don’t have to apply a huge pressure, just enough to ensure it is tight.
Re-attach the spark plug lead, and you’re ready to start your lawn mower.
Don’t attempt to put a spark plug designed for a motor vehicle in your lawn mower. The thread sizes are different, and trying to insert the wrong spark plug into your lawn mower will result in expensive damage to your lawn mower.
Spark plugs have a heat rating that you must also adhere to. If you use a spark plug with a different heat rating than the one specified in your manual, you risk the lawn mower not running correctly or overheating.
8 – Test Your Lawn Mower
Ensure fuel is in the tank and remove the chocks holding the wheels. Check underneath the lawn mower to ensure no tools or items might snag the blades.
With the lawn mower on a flat surface, you can press the primer bulb a few times if your lawn mower has one and set the choke and throttle to the start position as per your manual.
Ensure nothing is blocking the discharge chute, and disengage the blades if required for your lawn mower.
Then start your lawn mower.
Once the lawn mower is running, set it to idle and observe the exhaust emissions and the engine’s sound. There should be minimal smoke on start-up; once it is idling, there should be no smoke. It may take a little while for any oil or fuel build-up in the exhaust system to burn away, so don’t worry too much if you see some smoke for a few minutes.
After idling for a while, increase the throttle to see if the engine responds immediately. If it increases in revs as you increase the throttle, then combustion is occurring correctly. With the engine running smoothly, try cutting some grass.
While cutting grass, the engine should retain its power, neither slowing down too much nor cutting out.
If you hear the engine sputter or vibrate excessively, there is likely another issue with the lawn mower. If it stalls and fails to maintain power, you will need to investigate further to ascertain the cause of the problem now that you’ve eliminated the spark plug as the cause.
How To Use An Ignition Tester As An Alternative Way To Test A Bad Lawn Mower Spark Plug
You can use an ignition tester as an alternative to testing to see if you have and need to change a bad lawn mower spark plug. An ignition tester tests whether the ignition coil is sending a spark to the spark plug.
First, remove the spark plug lead from the spark plug and then attach one end of the tester to the spark plug. Plug the other end of the tester into the spark plug lead to complete the circuit.
The tester has a clear plastic section in which you can observe whether a spark is present when you pull the starter cord.
Make sure to keep your feet and hands clear of the blades, have an assistant pull the starter cord, and watch to see if a spark is visible in the tester.
If a spark is visible in the tester, the ignition system is sending the spark correctly, and you should change it with a new lawn mower spark plug.
When To Check And Replace Lawn Mower Spark Plugs
Check your spark plug at a minimum of every 25 hours. However, even new spark plugs can give you problems early on, and it’s quick and easy to pull it out and inspect or test it.
Change your lawn mower spark plug at least once every two years.
Understanding Lawn Mower Spark Plugs
As in any gasoline engine, the spark plug is a critical component without which the lawn mower will not run.
When the fuel and air mixture reaches the combustion chamber inside the engine, the piston compresses the mixture for ignition. As the piston reaches the top of its travel inside the bore, the ignition system produces an electric charge via the coil, creating a spark that ignites the fuel/air mixture.
The explosion of gasses provides the force driving the piston down, providing the power to turn the lawn mower engine over.
These little sparks are generated between 2,700 and 3,000 times per minute, transforming the potential energy in the fuel and air into the mechanical force that drives the blades cutting the grass.
The spark plug’s sole purpose is to ensure that the spark appears at precisely the right time, every time, while the engine is running.
Due to the extremely harsh operating conditions with high temperatures and constant exposure to the force of the fuel igniting, spark plugs are constructed from hardened steel and ceramic materials.
Lawn mower spark plugs have a useful working life of approximately two years. While the manufacturers say this, you may have to change them more often, especially if you do more than 25 to 30 hours of mowing each season.
My Experience With Diagnosing And Changing Bad Spark Plugs
Throughout my primary and high school career, I earned pocket money cutting my family’s lawns. Initially, it was behind the torturous rotary push lawn mower my grandpa used and later behind a bright yellow Briggs & Stratton.
It usually ran like a dream, but on one school holiday when I was about 12, it started to behave like an absolute pig. One minute it ran fine; the next, it was backfiring and belching smoke like an asthmatic dragon.
With my dad at work and grandpa in town, I had to sort out the problem. I started with the fuel, checking that the tank was full, inspecting the fuel filter, and looking for leaks or a pinched fuel line.
The air filter was next, removing the cover and checking that nothing blocked the inlet.
I gave the spark plug lead a cursory tug, pushed it back on tight, and then inspected the carburetor and reset the mixture. After almost an hour, I was no further forward, and the lawn mower refused to run properly.
It then dawned on me that I hadn’t actually checked the spark plug properly as I had been taught. I unscrewed it and inspected the tip, only to find it worn and pitted, with almost no electrode left at the end. A quick trip to the shed for a replacement, and the lawn mower was purring like it always did.
The moral of the story – always check the spark plug before you start pulling things apart.