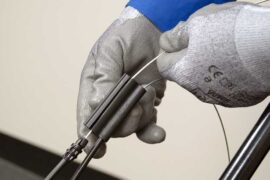
A self-propelled lawnmower is really a helpful tool for any house owner. If you are an owner of a self-propelled lawnmower, then you surely know the immense benefit of this type of mower.
But what about a damaged cable of it? with a damaged cable, you won’t be able to control the mower properly. It also leads the mower to run poorly.
Now come to the main fact. Are you suffering from the same problem? If so, then throw all of your worries. I have a perfect guideline that you are actually looking for.
In this article, I will try to give you a complete guideline on how to fix self propelled lawn mower cable. Believe me, after reading this article, fixing a self-propelled lawnmower cable will be a piece of cake to you.
So, why late? Let’s dive in.
In this content you’ll learn:
A Complete Guideline To Fix The Cable Of Self-propelled Lawnmower
Basically fixing the problem of self-propelled lawnmower cable is not a troublesome task. You approximately need 20-25 minutes to complete the entire task.
Let’s see the required tools at first before entering the fixing process.
Required tools:
- A new cord
- A plastic bag
- Needle nose pliers
- Screwdriver
- Socket wrench
- Hand gloves
- Goggles
Now you are ready to fix the issue of your self-propelled lawnmower cable. Follow the instructions outlined below to get rid of this issue.
Steps to follow:
Step #1: Remove The Spark Plug
Unplug the mowers’ spark plug. Every lawnmower has a spark plug and before doing any repair, you must unplug it. It will save you from being electrified at the time of repair.
Step #2: Release The Drive Cable Lever
Locate the drive cable of the mower. You will find it near the lawnmower handle. A lever is attached to the cable and releases the lever from the cable.
You will also need to depress the release tab. After depressing it, pull out the drive cable zone control clip. Cut down the ties of the drive cable to secure it.
Step #3: Remove The Drive Cover
Now, it’s time to remove the drive cover. A few simple steps help you to remove the cover. Let’s see what they are.
- Locate the mower fuel tank and remove the lid of the fuel tank.
- Place a plastic bag in the mouth of the fuel tank and replace the lid at its previous position.
- Lift the mower front wheels upwards and secure the lawnmower with its handle. Lift the mower to access the mounting screws at the bottom of the mower. Use a socket wrench to remove the mounting screws.
- These screws basically hold the mower drive cover. Unscrew the screws and carefully lower the lawnmower.
- Release the mower height adjustment bar. Now, you can easily remove the mower drive cover.
Step #4: Bring Out The Drive Cable
Find out the anchor post to remove the end of the mower drive cable. Depress the release tab to access the sheath of the drive cable. Now, it’s become a facile task for you to bring out the entire cable.
Step #5: Install The New Drive Cable
Take the new cable and install it starting from the anchor post. Follow the reverse process to install the new drive cable.
Step #6: Replace The Drive Cover
Replace the mower drive cover in its previous position and rearrange the bar of height adjustment.
Again lift the mower front wheel upwards and replace the mounting screws to attach the cover properly with the mower deck. Tighten the screws using the socket wrench.
Now, open the lid of the fuel tank and take off the plastic bag from the mouth of the fuel tank. Replace the lid again and tighten it by rotating clockwise.
Step #7: Reconnect The Spark Plug
You are in the final step of the fixing process. Reconnect the mower spark plug and your mower is completely ready for mowing now.
Cautions
- Don’t forget to wear safety clothing to avoid any kind of unforeseen accidents.
- Use a hydraulic jack to lift the mower and carefully check the jack whether it is set properly. Otherwise, the mower will fall down and your mower will be damaged.
Final verdict
Are you ready for fixing the cable now? I think you are. It’s really not a difficult task. But without a perfect guideline, it is not an easy task to do.
You can easily do this at home. If you do this at home, surely you can save your few bucks.
Hopefully this article has given you a perfect guideline on how to fix a self propelled lawn mower cable.
So, without hesitating, do it yourself.
