For making a lawn wonderful and enticing, a lawnmower is a must. But with this effective tool, sometimes you may face some critical situation.
You know since it is a tool it can cause a lot of trouble. One of which is bent or punctured to the wheel. If the tire is punctured anyhow, it becomes a very difficult and challenging job to operate a lawnmower. Changing the wheel becomes a pressing necessity to solve this problem.
Seems hazard to you? No way.
Changing a wheel isn’t a hard thing to do if you have just proper experience on it. However, if you have no knowledge of that, this article will contribute to let you know useful information.
In this article, you will have knowledge about how to remove a lawnmower wheel and lawn mower wheel replacement process.
So let’s have no wasting of time. We’re here to smooth your journey. Let’s kick-off.
In this content you’ll learn:
Process Of Removing A Lawnmower Wheel
Here we’ll guide you that how to remove the two most frequently used lawn mowers wheels.
How To Remove Push Lawn Mower Wheel
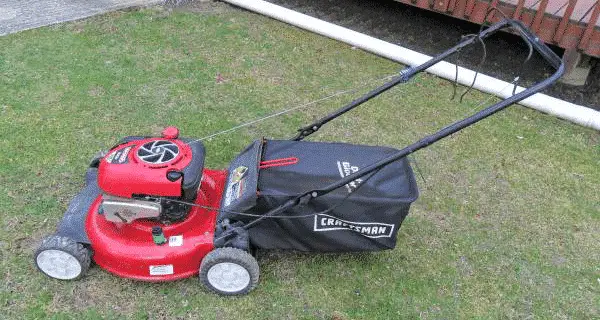
If you have a push lawnmower and want to remove its wheel, follow the steps outlined below. This process helps you to remove the wheel in just 5 to 10 minutes. But first of all, have a look at the necessary equipment that you will need:
- Hand gloves
- Goggles
- A brick or a wooden block
- Screwdriver
- Socket Wrench
- Pliers
Steps to Follow:
Step #1: Unplug The Spark Plug
To avoid power contact, first, unplug your mower’s power supply. Each mower has a separate battery connection system. Find it out and disconnect it.
Step #2: Place A Brick Or wood Under The Wheel
Raise the mower gently and place a piece of brick or wood underneath its front edge. Follow the same process if you want to remove the rear wheel, and place a piece of brick or wood below the rear wheels.
Step #3: Remove The Hubcap
If you do not see a screw in the center of the wheel, you can be sure it is covered with a hubcap. Remove the hubcap using a hand or a screwdriver. With a tap, the hubcap will come out.
Step #4: Remove The Center Screw
Take a socket wrench. Rotate the screw in the center of the wheel anticlockwise by using the wrench. The screw will come out quickly.
Step #5: Remove The Washer
Remove the washer under the screw by hand or by using the pliers. Although most push mowers do not have this washer.
Step #6: Bring Out The Old Wheel and Install New One
When all parts are put off, place your hands on the rubber around the wheels. Rotate the wheel slowly and gently apply pressure. No need to apply too much pressure. The wheel will come out slowly. Follow the reverse procedure as described above for the installation of the new wheels of the same model and brand.
How To Remove Riding Lawn Mower Wheels
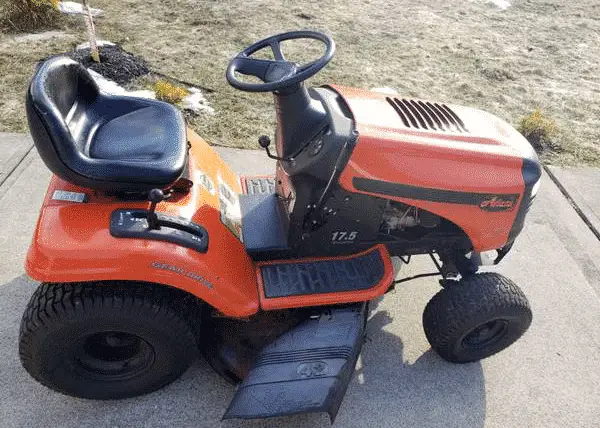
If you would like to change the wheel of a riding mower, follow the steps outlined below. These steps will make your job easier and reduce the hassle. It may take 10 to 15 minutes to complete the entire process.
Necessary equipment:
- Mower lifter
- Hand gloves
- Goggles
- Flathead screwdriver
- Pliers
Steps to Follow:
Step #1: Remove The Power Cord
First, place the mower on a flat surface for ease of work. Disconnect the power cord from the battery carefully.
Step #2: Place Lawn Mower Lifter
Place the mower lifter under the wheels you want to change.
Step #3: Adjust Lawn Mower Lifter
Please go through the User Manual carefully first before using Mower Lifter for safety purposes. Now, use the mower lifter. Keep applying pressure in the paddle of the mower lifter until it makes 90 degrees angle approximately with the ground. Lock the pins attached to the lifter well.
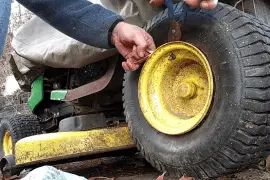
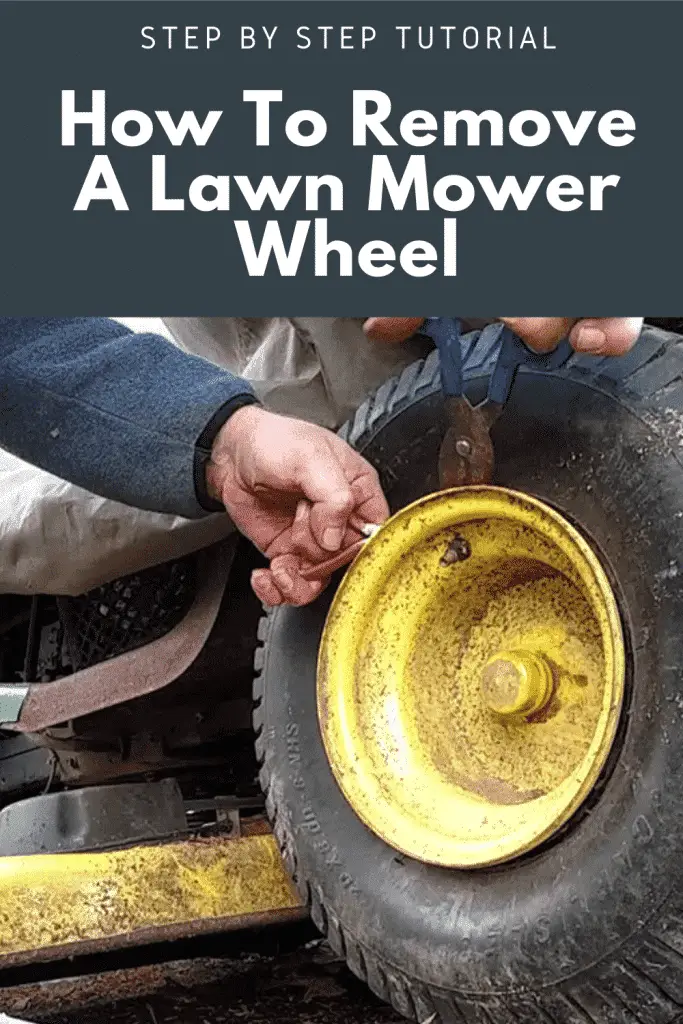
Step #4: Remove The Wheel Plastic Cap
Now wear hand gloves. Rotate the plastic cap mounted on the center of the wheel anticlockwise. Slowly the cap will come out. Although most riding mowers do not have this cap.
Step #5: Remove The Cotter Pin
After removing the protective cap, you will see a cotter pin. Run a screwdriver between the axle pin and the cotter pin. Pull the pinout of the center of the wheel to close it.
To do this work effectively, you must have a good screwdriver set.
You can remove the cotter pin by dragging it to the outside using the pliers. Hold the cotter pin tightly with the pliers and pull it firmly toward you so that the pin comes out.
Step #6: Remove The Washer
Pull the washer under the pin outwards and remove it.
Step #7: Bring Out The Old Wheel and Install New One
Trying to remove a large wheel is a little bit tough task but not impossible. Keeping your hands behind the wheel, slowly pull it outwards. The wheel will come out slowly and you’re done.
To have the installation of the new wheels of the same model and company, follow the reverse procedure as mentioned above.
How To Remove Rusty Or Stuck Wheels From Lawn Mower
If the wheel does not come out even after removing the central nut, cotter pin, and washer, it can be assumed that there is a possibility of rust in the center of the wheel.
Also, there is the possibility that such problems may occur when excess dirt is stuck to the wheel or if a hard object is stuck in the center of the wheel. In this case, the following processes can help you get rid of this problem.
Necessary equipment:
- Oil lubricant
- A wooden block
- A hammer
- Scrub brush
Steps to Follow:
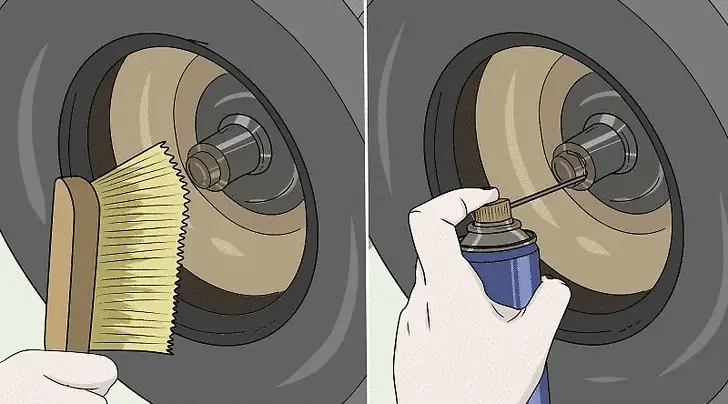
Step #1: Spray Oil Lubricant
If the wheel does not come out of the main axle, spray some oil lubricant around the center pin. Try to pull the wheel gently by dragging it back and forth. However, be careful not to damage the main axle.
Step #2: Try Hammer and Wood Process
Even if the wheel does not come out, take a piece of wood and a hammer. Place the wood somewhere between the center of the wheel and the edge.
Hold the piece of wood well with one hand and continue to hit the wood using the hammer with the other hand. After hitting it for a while, try to bring the wheel out. If it does not come out then repeat the process until the wheel is out.
Step #3: Clean The Center Nut
Sometimes rust occurs in the central nut. Take a hard fiber scrub brush and clean the central nut by rubbing it with the brush. Then spray some oil lubricant around the nut. Try to rotate the nut anticlockwise. Keep trying until it comes out.
The verdict
If you are a push lawn mower user, it won’t be a tough task for you to remove a wheel. It is affordable, facile and takes less time. Using a push lawn mower is also effective for your health.
But when you use a riding lawn mower, removing a wheel is costly, time-consuming and difficult. You need more equipment to remove a wheel. Sometimes it is risky to remove a riding lawn mower wheel by yourself.
Hopefully, this article has helped you and has given you all the knowledge on how to remove a Lawn Mower Wheel.