A control cable is one of the many crucial parts of a lawn mower. However, due to extensive use, it wears down and needs a replacement. You may find at some point that the self-driving feature is not working properly, this is caused by a faulty control cable on your lawn mower.
This article will outline how to replace a control cable on a Troy-Bilt lawn mower. This replacement process requires a proper understanding of the steps. It may seem complex on your first try, but once you finish, it will become very easy going forward.
Gather the necessary tools and you are good to go with the steps listed below.
In this content you’ll learn:
How To Replace A Control Cable On A Troy-bilt Lawn Mower?
Well, the processes are simple if you understand them well. So, the suggestion is to go through the whole process before you start doing it. It will help you keep the next step on your mind while working.
Required Tools
You need the right tools to unscrew the bolts and to gain access to the wires within the machine. Here is the set of tools:
Precautions
There are certain precautions to take into consideration during this maintenance job.
Before you begin with the process, make sure the engine has been shut off and cooled down. Unplug the connecting wire from the spark plug to avoid the engine accidentally starting. It’s best to keep little to no fuel on the tank to prevent spillage.
A control cable end does not have any cover on the metal wire. This cable is made up of several thin wires, some of which may break due to extensive use. The ends of the wires can be quite sharp and may be a hazard to your fingers, so using protective gloves will be beneficial.
Follow these steps to replace the control cable:
Step 1: First, you need to access the front transmission cover below the lawn mower. So, put something heavy on the mower handle to tip it and keep it in position.
Step 2: Now, take the 3/8” socket. There will be bolts that secure the front transmission cover. Unthread them with the Socket.
Step 3: Unthread the two upper screws on the top that secures the cover.
Step 4: To detach the cover, pull the wheel adjustment levers outward. Now, entirely remove the cover from the mower.
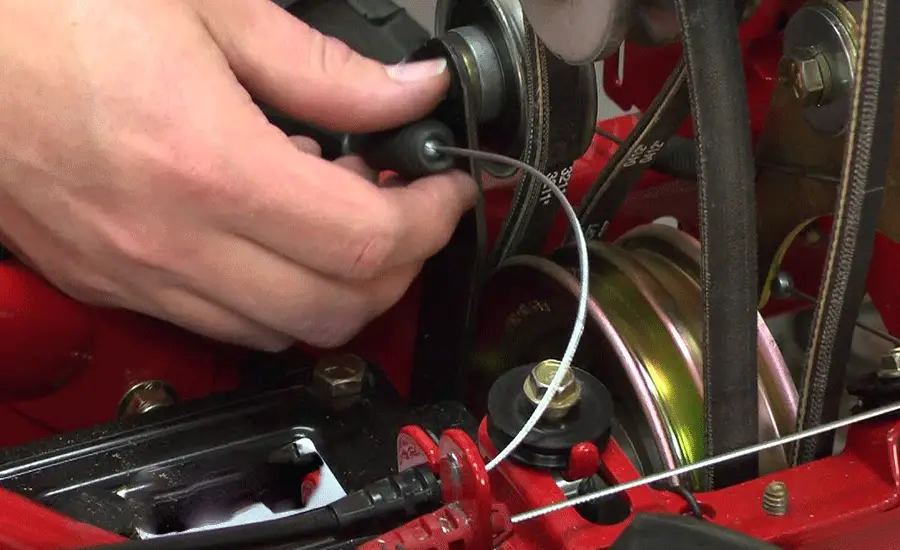
Step 5: Take the needle nose plier. There will be a locking mechanism. Press the tabs inward to detach the wire from the lock. There will be two tabs that will lock the wire in place. When you press them, the wire will come off.
Step 6: Remove the end portion of the control cable from the support.
Step 7: Revert the lawn mower to its upright position by removing the weights.
Step 8: Take the Phillips screwdriver. Now, unthread the handle housing screw. Take the flat head screwdriver and place it onto the hole on top of the housing to depress the locking mechanism. Now you will get into the cable access cover.
Step 9: Next, remove the cable from the access cover of the drive control handle.
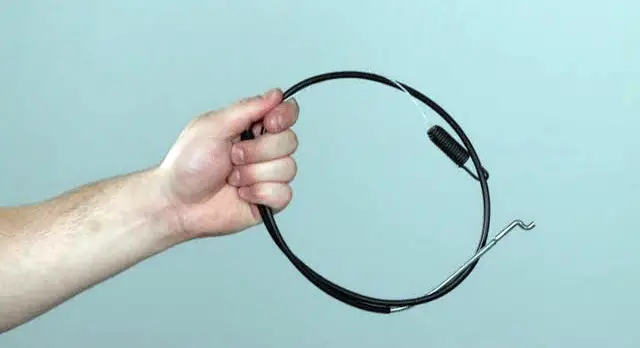
Step 10: Take the replacement control cable and place it on the access cover. Close the cover, place the screws and tighten them up.
Step 11: Tip the mower by placing something heavy on the mower handle. Attach the cable end to the support and lock it in place on the transmission.
Step 12: Hold the axle assembly and insert the transmission cover. Pull the wheel lever outward to put the cover properly in position.
Step 13: Replace all of the 9 screws, starting from the bottom.
Step 14: Make the mower upright by removing the weights from the handle. Now, use zip tie retainers to secure the cable with the handle if needed.
Finally, attach the ignition wire connection and fill the tank with fuel. Now your lawn mower should be ready to go.
To sum up:
You know how crucial the control cable is if you own a lawn mower. Sometimes it may break if you do not change a faulty wire for a long time. Take proper care of your mower and do the necessary maintenance to keep it in a healthy condition.
Follow the step-by-step procedure on how to replace a control cable on a Troy-Bilt lawn mower mentioned above. It’s always a good idea to have a clear picture of the process in your mind before you begin this maintenance service like this. Try to follow the precautions to avoid getting into any trouble.