It is needless to say an air filter is a vital part of a lawnmower. You know an air filter is placed between the engine and the carburetor. And so it acts as a soldier and fights against the dirt and debris to keep the engine in a safe position.
A clean air filter blocks the dirt and debris to enter into the engine compartment. But a dirty or torn one loses its ability to save the engine from dirt and debris.
So, what can you do now? I think you assume something. Yes, cleaning an air filter can save your engine from this hassle.
But have you any idea about how to clean a lawn mower air filter? If don’t, will you leave your air filter uncleaned? No way.
In this article, you will get all the information in this regard.
Let’s dig it.
In this content you’ll learn:
Guidelines On Cleaning An Air Filter Of Lawnmower
You know regular maintenance can keep the air filter in good condition. In fact, it is always recommended to clean the air filter after 25 hours of operating the lawnmower. And you should replace the air filter after 300 hours of operating the lawnmower.
A clean air filter increases the performance of the engine and a dirty one deteriorates the engine’s performance. If your lawn is full of dirt and debris, you need to be more careful about the maintenance of the air filter.
Before going to the main cleaning process, let’s know how many types of air filter is used in the lawnmower.
Basically, there are two types of air filters used in the lawnmower. One is the foam air filter and the other is the dual air filter.
In this article, you are going to get all the solutions about the cleaning process of both filters.
Foam Air Filter Cleaning Process
Even the foam air filter comes in two types. The first one is the disposable air filter and the reusable air filter is the second one.
Now, before we start cleaning, we need some necessary tools and materials to complete the task. Let’s have a look at them.
Necessary items
- A liquid soap to clean the grease from the air filters.
- A paper towel to wipe.
- Motor oil.
- Water.
- A cleaning brush.
After Getting All The Required Tools And Materials, Let’s Dive Into The Cleaning Process In Detail.
For disposable foam air filter
Steps to follow:
Step #1: Prepare The Lawn Mower
Take the lawnmower into a flat surface for the convenience of work.
Step #2: Disconnect The Power Cable
Activate the parking mode and disconnect the power cable from the battery.
Step #3: Remove Filter Housing Top Cover
Locate the filter housing and remove the top cover.
Step #4: Install New Air Filter
Bring out the air filter and install the new one. Before buying the new one, check the user manual of the lawnmower to know about the correct size of the air filter.
Step #5: Replace Filter Housing
After installing the new air filter, replace the filter housing in its previous position.
Step #6: Reconnect Power Cable
Connect the power cable with the battery and deactivate the parking mode.
For Reusable Foam Air Filter
Steps to follow:
Step #1: Active Parking Mode
Take the lawnmower into a flat surface and activate the parking mode.
Step #2: Disconnect Power Cable
Disconnect the power cable from the battery. It will save you from being electrified.
Step #3: Remove Filter Housing Top Cover
Locate the filter housing and remove the top cover.
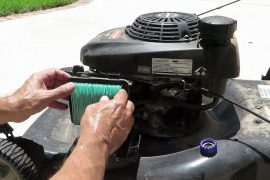
Step #4: Clean Air Filter
Bring out the air filter and rinse it into water. Apply some liquid soap to clean the grease from the filter.
Step #5: Remove Water Completely
After cleaning the filter, wipe it by using a paper towel. Keep wiping until the water is removed.
Step #6: Spray Motor oil
Now spray some motor oil on both sides of the air filter. Do not apply too much oil as it may damage the filter.
Excessive oil the air filter will produce black smoke when you start the mower. If you feel that excessive oil has been applied, wipe it off with a paper towel.
Step #7: Replace Air Filter and Housing
Replace the air filter and filter housing into its previous position.
Step #8: Reconnect the Power cable
Connect the power cable with the battery and deactivate the parking mode. Your mower is now ready for use.
Dual Air Filter Cleaning Process
Steps to follow:
Step #1: Prepare The Lawn Mower
Take the lawnmower into your garage or a flat surface for the convenience of the work.
Step #2: Disconnect Power Cable
Activate the parking mode and disconnect the power cable from the battery.
Step #3: Remove Filter Housing Top Cover
Locate the air filter housing and remove the top cover.
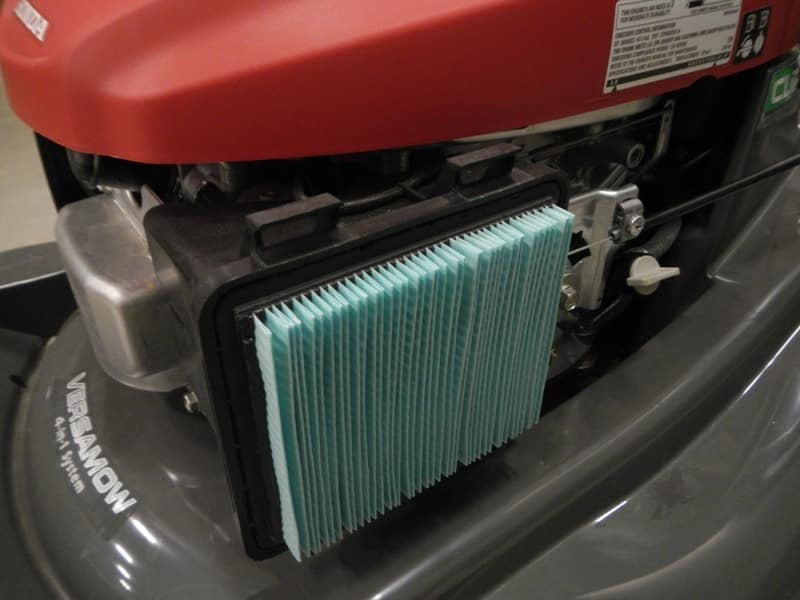
Step #4: Clean Air Filter
You will find a paper cartridge attached to the air filter. Separate the filter paper from the cartridge and bring it out. Never clean the air filter using an air compressor. This can damage the air filter.
Step #5: Go Through User Manual
Before cleaning the dual filter, go through the user manual of the lawnmower to check if there is any possibility to cause damage in applying soap or oil to it. If there is any problem, then it is better to change the air filter.
Step #6: Apply Liquid Soap
If there is no problem, soak the filter in water for a while. Rinse the filter thoroughly using liquid soap to remove grease from the filter. However, take care during washing so that the filter is not damaged.
Step #7: Remove Water Completely
After washing, use a paper towel to wipe the filter well so that there can be no water remaining in the filter.
Step #8: Spray Motor Oil
This time, spray some motor oil on both sides of the air filter. Do not apply too much oil as it may damage the filter. Wipe the filter again with the paper towel to remove excess oil.
Step #9: Clean Air Filter Compartment
Clean the air filter compartment by using a cleaning brush before installing the air filter into its previous position.
Step #10: Reinstall Air Filter
Attach the air filter with the paper cartridge. Replace the cover over the air filter housing.
Step #11: Connect The Power Cable
Connect the power cable with the battery and deactivate the parking mode.
Done! Now the air filter of the lawnmower is ready to take the pressure of the dirt and debris.
Cautions:
- Avoid solvent washing materials for cleaning foam air filters.
- Go through the user manual of the lawnmower to get the appropriate cleaning instructions.
Final Verdict
I think you will agree with me that cleaning an air filter is a simple task if you just follow the above-mentioned process. And of course, regular cleaning of the air filter increases the durability of the engine as well as the lawnmower.
I hope from this article you have got a clear idea of how to clean a lawn mower air filter. Now it’s your turn.
Clean the air filter, increase the durability of the mower, and enjoy your leisure time by mowing.