You may get into a situation where you turn the key on your riding mower and the solenoid clicks but it does not engage the starter. If the solenoid is not engaging the starter, the engine won’t start. You need to replace the old solenoid with a newer one in this situation.
Since changing a starter solenoid is a step-by-step procedure, we have come up with a guide for you. This article will discuss how to replace a starter solenoid on a lawn mower.
Try to get a solid understanding of the procedure first before you start.
In this content you’ll learn:
How To Replace A Starter Solenoid On A Lawn Mower?
You press an ignition key but your lawn mower is not starting. Either a dead battery or a problematic starter solenoid is likely the cause of this. You can use another battery to check whether a dead battery is causing the problem. If not, then the problem is the solenoid on your mower’s starter module. This guide is for you if you are in this situation:
Arrangement:
Keep the lawn mower on a flat surface. Turn off the ignition switch and remove the key. Then, detach the cable connection from the ignitor. After that, take hand gloves for safety during the replacement.
Here are the steps to follow:
Step 1: Remove the battery
Lift the mower seat to access the battery assembly. Open the insulation cap on the negative terminal of the battery. Now remove the connecting bolt from the negative terminal.
Open the insulation cap on the battery’s positive terminal. Now remove the bolt that connects the positive terminal of the battery.
Finally, remove the battery from the housing.
Step 2: Remove the battery housing
The solenoid lies under the battery. To get there, you need to remove the battery housing first.
To do that, release the cable harness clip from the seat bracket to disconnect the battery loose connection. Now release the retaining tabs to remove the battery housing from the mower’s main body.
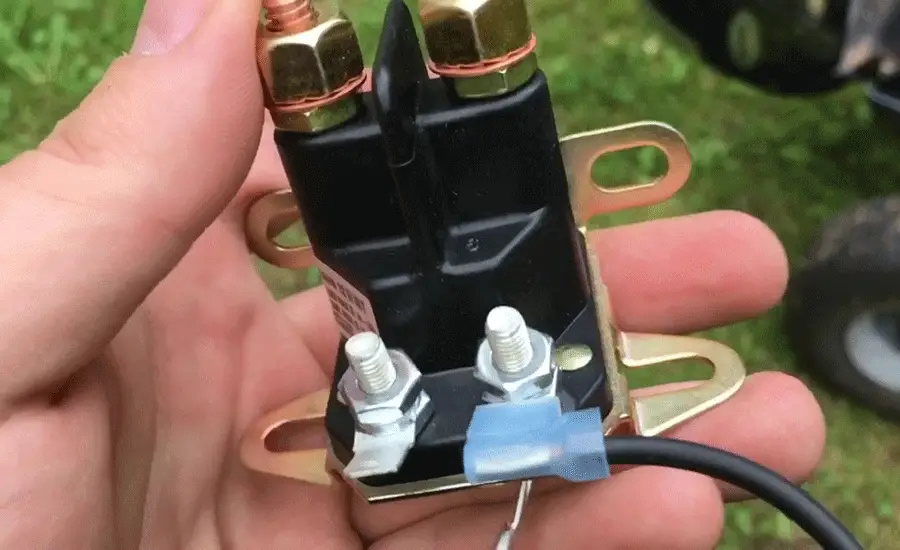
Step 3: Take a picture of the location of the wires on the starter solenoid
There will be multiple wires on the starter solenoid. You will have to reconnect them after replacing the old solenoid. Each of the cables should be in its respective position. There is no room for errors here.
To ensure that they are connected correctly at the end of this process, take a picture of the location of the wires. This picture will help you validate the proper positioning of the cables when you connect them again.
Step 4: Remove the old solenoid
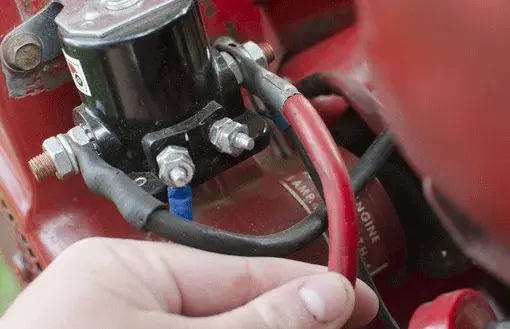
Remove the cable mounting nuts from two of the terminals of the solenoid. Pull the cables out from the terminal.
Then remove the solenoid mounting bolt from the lawn mower frame. To remove the solenoid from the mower frame, rotate it forward and pull it out.
Step 5: Transfer the mounting clip
Remove the mounting clip from the old solenoid. Transfer it to the replacement solenoid. The mounting clip will not come along with the newly purchased one. So, you have to use the older one.
Step 6: Install the new solenoid
Place the new starter solenoid on the mower’s frame. Simply put the mounting clip in place and rotate it inward.
Reconnect the mounting bolt to attach the new solenoid to the frame.
Step 7: Reconnect the wires
Wire arrangements should be okay, otherwise, the problem will remain. If the problem remains, there could be smoke, or the wire will get hot due to improper cable placement. This part is the most important section of the whole process. So be careful when performing this step.
Reconnect the wires in the correct position on the solenoid terminals. Use the pictures you have on your phone to validate the correct wire positions.
Take the wire mounting bolts and put them back in place.
Step 8: Reinstall the battery housing
Put the battery housing inside the mower’s body. Then lower it to engage the retaining tabs. Reconnect the wire harness on the seat bracket.
Step 9: Reinstall the battery on the housing
Put the battery back into its housing. Lower the battery inside to fit it correctly in place.
Connect the positive and negative cables of the battery to their respective terminals. Put the connecting wires back on the two connection points of the battery.
Be careful about the positive and negative terminal connections. Do not accidentally switch the wires.
Step 10: Test the lawnmower
Finally, you are done with replacing the starter solenoid on your riding mower. Now reconnect the wire for the ignition. Turn on the ignition switch and put the key back on the mower.
If you have connected the wire properly, the mower should start perfectly. If not, immediately remove the ignition key and turn off the switch. Recheck all of the wire connections and see if there is any misalignment. Hopefully, you can locate the problem, and it will simply be the wire connection. Then test the mower again. It will start correctly this time.

What Causes A Starter Solenoid To Go Bad?
First of all, this is an electrical component. So, it can fail at any time.
Usually, it can go bad when the copper plates on the solenoid corrode. A weak starter and a deficient battery can also cause a failing solenoid.
Symptoms Of A Bad Solenoid
The most common symptom of a bad solenoid is a clicking or humming sound when turning the ignition key. If you hear clicking sounds but the starter is not engaging, this can be the solenoid.
There can be smoke due to the wires heating up. This is another symptom to identify the poor condition of a starter solenoid.
Finally
Your lawn mower is the essential machine to keep your lawn beautiful. Sometimes a maintenance job is necessary. If you learn the processes for some of the common ones, you don’t need professional help. You can do them on your own easily. Usually, most mower owners keep the necessary tools in their house and fix most of the mower issues by themselves.
This was all about the DIY method of how to replace a starter solenoid on a lawn mower. These simple procedures should help you when you require a solenoid change.