
In this content you’ll learn:
Key Takeaways
- Your lawn mower failing could be due to many reasons.
- The most common include lack of regular maintenance, a dirty air filter, old fuel, the spark plug, carburetor, electrical system, belts, blades, drive system, or the engine.
- You can fix some of these issues yourself, and some require professional assistance.
Lawn mowers fail for many reasons. However, some are more common than others. So, these are the top ten reasons your lawn mower is failing.
Top Ten Reasons Your Lawn Mower Is Failing (And What To Do)
Between the wear and tear and skipping over simple maintenance steps, a lawn mower’s components will eventually fail. It is difficult to say which parts will break down or give you trouble first, but there are signs to look for and steps to prevent these failures.
Follow Proper Safety Precautions First
Always wear goggles and gloves. Put your lawn mower on a stable, level surface in a well-ventilated area. Have rags handy in case of spills.
Set wheel chocks in front of and behind your lawn mower to prevent it from rolling.
Once all of that’s done, it’s time to get to work.
Let’s begin with a lack of regular maintenance.
1 – Lack Of Regular Maintenance
Regular maintenance (using a schedule helps with this) is essential for your lawn mower to stay healthy and perform optimally. Failure to perform regular lawn mower maintenance can lead to many problems, which can worsen with time.
So, to avoid this, here are the parts of your lawn mower you need to check regularly and how.
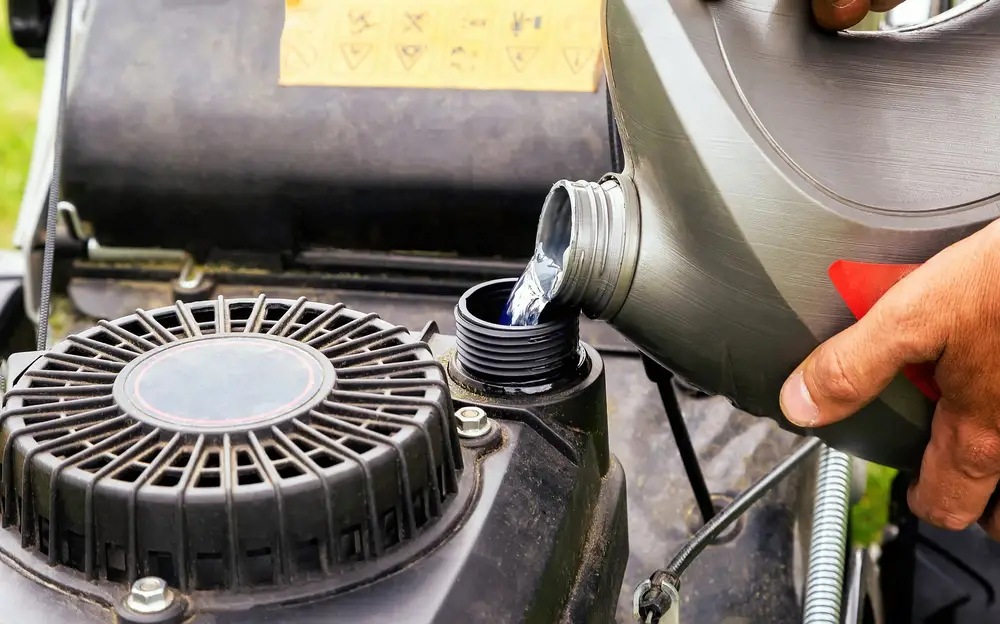
Check Oil Level
Look for the cap showing an oil can or the word “OIL.” Unscrew the cap, pull the metal dipstick out, and wipe it clean. Place it back inside, pull the dipstick out again, and look for the lines and where the oil level is showing.
Oil should reach the lines “ADD” or “FULL.” Sometimes it will show in the “SAFE” area, marked between the full and add markings. Please note that the engine must be cold and the lawn mower on level ground for an accurate reading.
Change the oil before the first grass cut of the season or every 50 hours, whichever comes first. Wear gloves for protection.
A plug is at the bottom of the cylinder where you check the oil. Remove the plug to drain the oil and discard it according to EPA Standards in your location.
If there is an oil filter, look for it in the owner’s manual and replace it. You will need an oil filter wrench, a round tool fitting over the end of the filter, allowing you to turn to loosen and tighten it. Take caution because the oil will spill from there once you’ve loosened the filter.
When you’ve completely drained the oil, put the plug back in place, use a funnel, and put it in the same area as the dipstick. Follow the instructions in your owner’s manual for how much oil you need and what type. Put the oil cap back on, and you’re good to go.
Check Tire Pressure
You will use a tire pressure gauge to check the air in each tire. Unscrew the cap from the valve stem (where the air goes into the tire, look for the black stem sticking out of the rim). Press the gauge firmly, straight over, and onto the valve stem to prevent air leaks. The reader will tell you how much air pressure is in each tire.
Read your owner’s manual for what the readings should be.
If the readings are low, use an air compressor the same way you used the tire pressure gauge to put air in your tires. Screw the cap back on the valve stem when complete.
Always check air pressure before using your lawn mower.
Check Fuel Level
Some lawn mowers have gas gauges, while for others, you will have to remove the cap to check the level. If the fuel level is close to the bottom of the tank, fill it with fresh gas without overflowing it.
Always check the fuel before starting.
Grease All Zerks
Take a grease gun and place its connection on the zerks (the only stem sticking out of a constantly moving part where the grease gun inserts to add the grease) until it clicks. You will find zerks where high-spinning or moveable parts are.
Ensure the grease gun is straight on the zerk. To locate all the grease zerks, you look at your owner’s manual under “Maintenance/Greasing or Lubrication.”
If you are unsure, bring it to a local lawn mower mechanic. Please note some are sealed and do not have a grease zerk. The owner’s manual will inform you of this.
Do this at least every other cut.
Remove Dirt And Debris
Use a blower to remove all dirt and debris from any part of your lawn mower before, during, and after every cut.
Check For Loose Components
If anything is loose, tighten it back up before each use.
Change The Air Filter
Change it once at the beginning of a year unless cutting in dirt-filled areas. If so, change it again at the halfway mark of the calendar year.
Keep Blades Sharp
Do this after every other cut or once a month, whichever comes first.
Drain Fluids Before Storing
When grass-cutting season ends and the lawn mower goes in the shed for a month or more, drain the gas and oil to prevent it from caking up in the tanks, lines, and engine. Drain the oil the same way you change it only after the fuel runs out, not before.
2 – Dirty Air Filter
Your lawn mower’s engine requires proper air circulation to work. The air filter prevents dirt and debris in the air from getting into the engine.
Dirty air filters bog lawn mowers down when they cut thicker grass. A dirty air filter also causes the engine to stall or die.
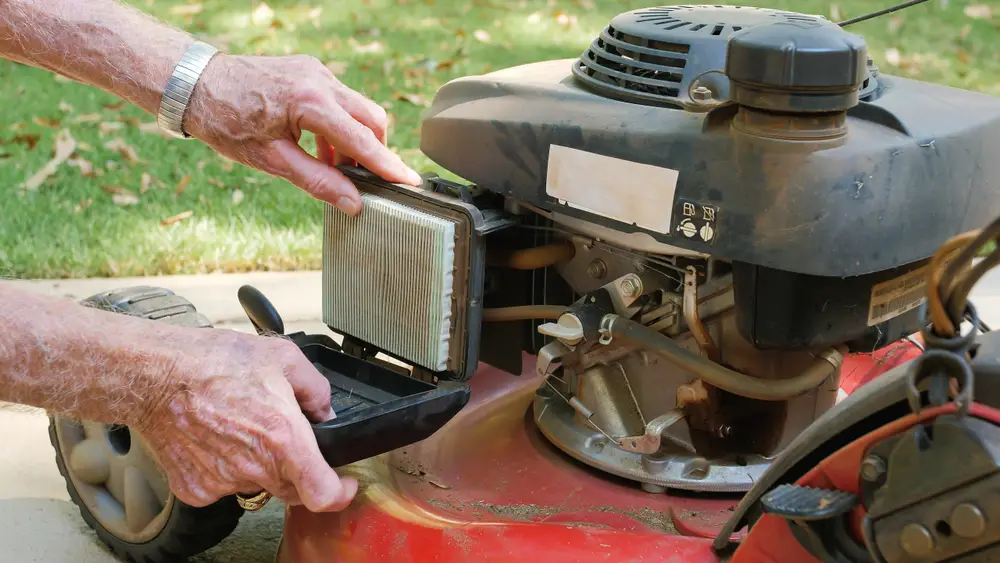
How To Clean Or Replace The Air Filter
Sometimes cleaning the filter until the next grass-cutting season is sufficient. To do so, locate the air filter compartment on the side of the motor. It will have a metal compartment with a single nut resembling a butterfly’s wings.
Remove the nut and pull out the filter. Use an air compressor blower and blow out the filter completely. Always blow from the inside of the filter (inner circle) toward the outside and replace it when done.
Put the air filter back, cover the compartment, and screw the butterfly nut back on until snug.
If that doesn’t work, get a new air filter to replace the old one.
3 – Old Or Dirty Fuel
Like food, fuel goes stale without using it promptly. Over time, fuel crystalizes, making it useless and damaging to a lawn mower.
Also, if there is excess junk in the gas, it will clog up the fuel lines leading up to the engine.
How To Drain Old Fuel And Use Fuel Stabilizers
We recommend running the motor on its last cut until it runs out of fuel, but only for a short time (about 15-20 minutes). You don’t want the engine to overheat. If there is too much fuel to let the lawn mower run out, you will need a siphoning hose and a gas can.
Place one end of the hose in the gas tank and the other in the gas can to siphon. Push the bulb in the middle of the hose until the air goes out of both sides of the hose, then fuel will flow from the tank into the can.
Once most of the gas is out of the tank, crank the lawn mower and let the rest burn out so the lines and tank are empty. Use fuel stabilizers to keep the fuel fresh (and to prevent it from crystallizing) for the next season’s use.
Each stabilizer is different, and it’s critical to follow its instructions. The stabilizer will help the mechanical process the following season and keep your lawn mower in its best working condition.
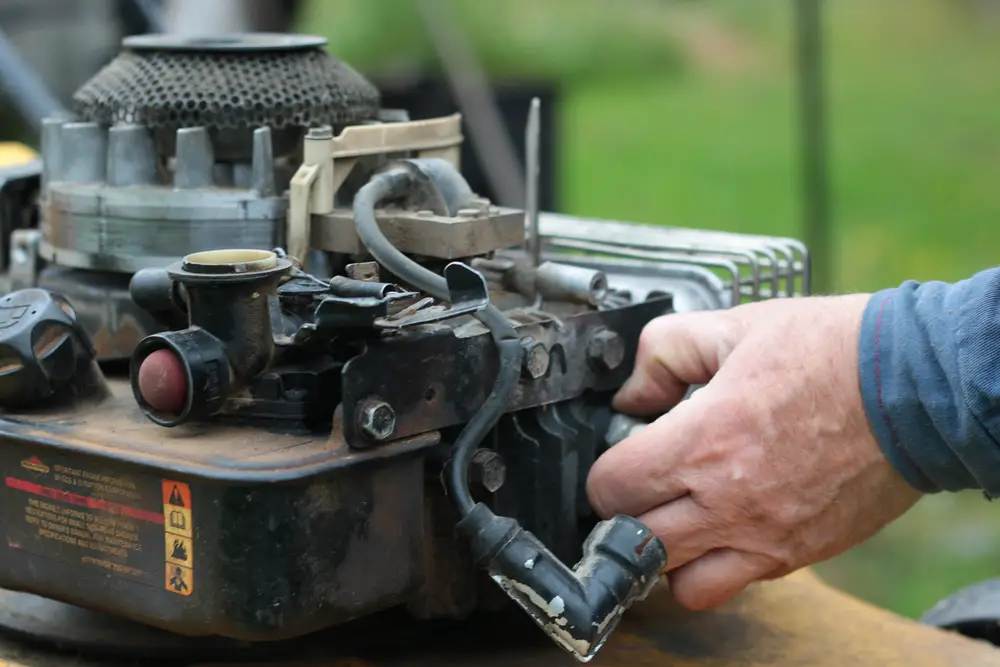
4 – Spark Plug Problems
Spark plugs are in the front of the engine. Look for a hole in the front of the housing (plastic cover) with an L-shaped wire going into the hole. Underneath the wire is the spark plug, which works with the ignition system to keep your lawn mower running.
Spark plug issues cause the engine several problems, including inconsistency, misfiring, and not running correctly.
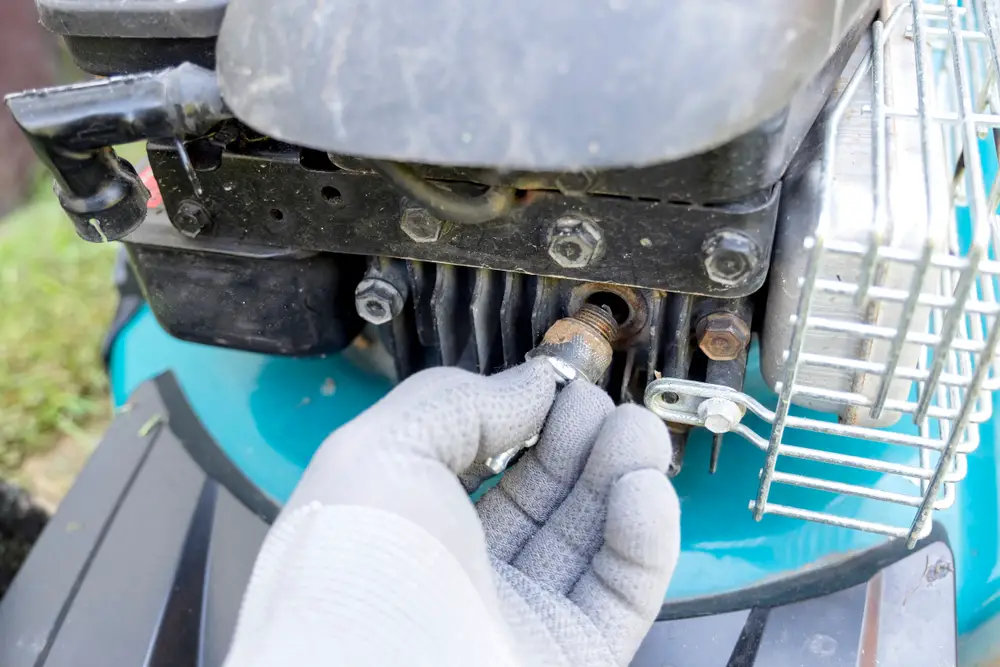
How To Check And Replace Your Spark Plug
To remove the spark plug, grab and firmly pull the wire from it. Once you remove the wire, you will notice a long, slim, white piece with a silver tip (the spark plug). You will need a ⅝” deep socket and ratchet to unscrew the spark plug.
Ensure the ratchet is in unscrewing mode and fix the socket completely over the spark plug until it cannot go anymore. Carefully turn it. Once the spark plug’s out, check for any irregularities, such as a burnt look or improper gap (using a gap tool) with the L-shaped piece at the end (spark plugs need the correct gap to work properly).
If you notice these issues, replace the old spark plug with a new one.
Set the proper gap for the new one with your gap tool, then screw it in by hand, keeping it straight. Use the socket and ratchet to tighten it, but don’t overdo it. Put the connection firmly on the spark plug and press until it clicks.
5 – Carburetor Troubles
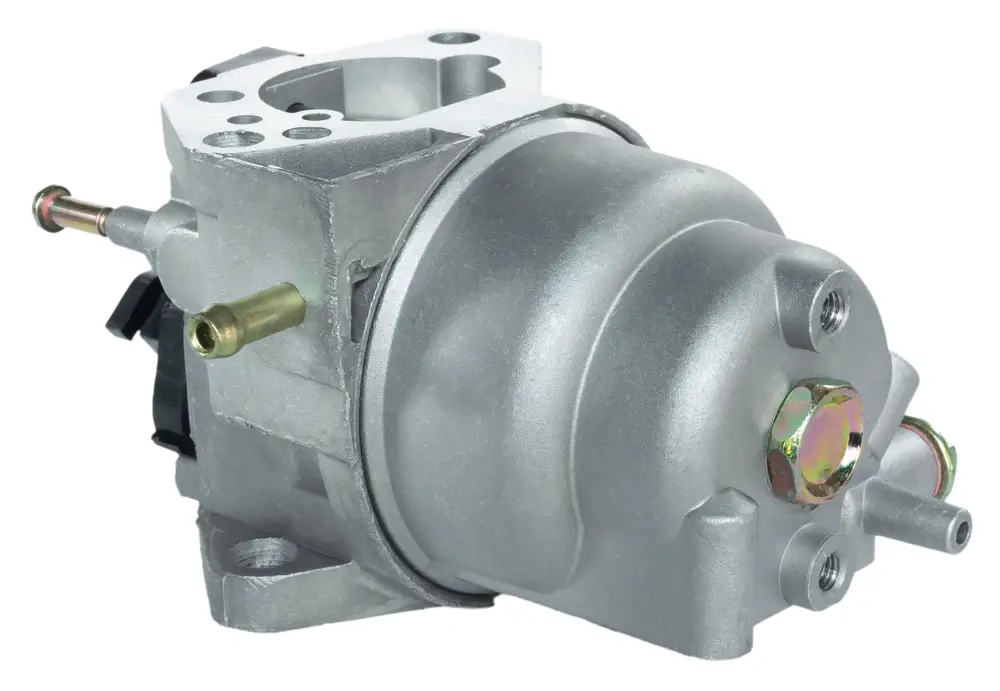
Carburetors feed fuel to your lawn mower’s engine. They ensure the proper fuel-to-air ratio.
Possible issues include:
- Air filter debris getting into the carburetor
- Parts wearing down
- Throttle cable from the throttle to the carburetor breaking
Cleaning The Carburetor
Cleaning the carburetor is easy; you only need a can of carburetor cleaner to spray in and around the carburetor. It will remove all dirt, debris, and gunk. Wipe it clean, let it air dry, and spray again if needed.
For other issues, consult a professional.
6 – Faulty Battery Or Electric Components
Nothing electrical will work if the battery fails, such as the headlights or hour meters. However, if an electrical component fails, only that one part will be out of operation.
Let’s start with the battery.
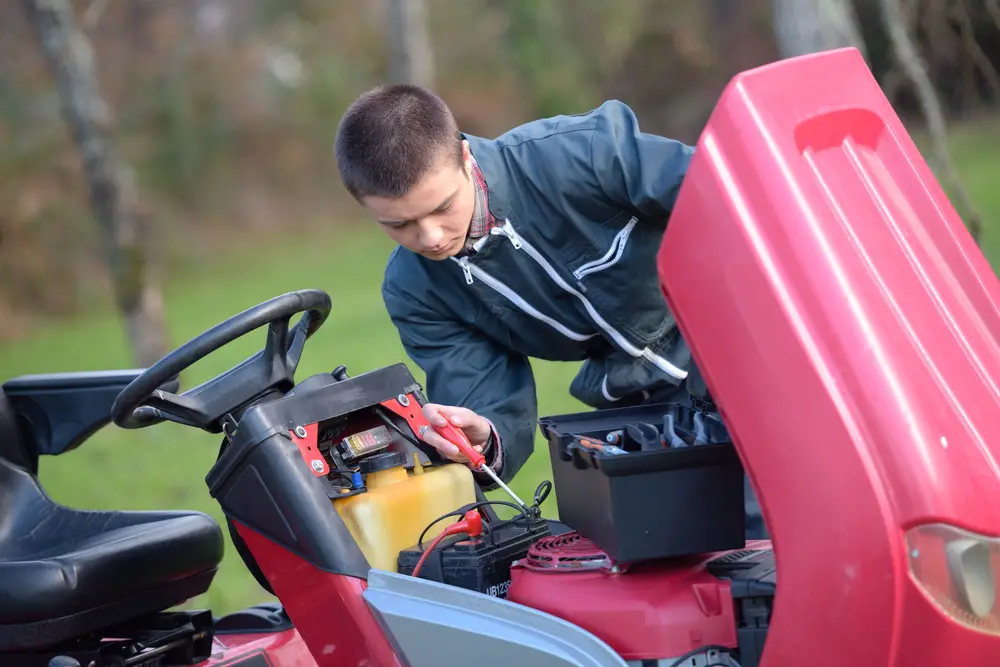
Testing, Charging, And Replacing The Battery
If you turn your lawn mower key and nothing happens, chances are high the battery failed. The only way to find out for sure is with a battery tester/charger system.
In this order, hook the negative clamp (black) to the negative battery post and the positive clamp (red) to the positive battery post. Then plug in the tester/charger, which will tell you if the battery is still charged (be sure the switch on the tester is set to 12 volts).
If not, there should be a switch to charge the battery. The charger may have quick settings for 4-6 hours, while others charge overnight for 8-12 hours.
When it is done, unhook the clamps from the battery posts and try starting your lawn mower. If it doesn’t work, you will have to replace the battery.
Remove the battery cables from the post with a wrench (sizes vary). Unbolt the holders at the bottom of the battery and remove it.
Replace it with the new one, return the holders, and bolt them in place. Then put the cables back negative post first, then the positive, and be sure they are tight.
Test your lawn mower again to make sure it’s working correctly.
Troubleshooting Other Electrical Components
The primary components to check are the ignition switch for the key, the safety switch under the seat, which is usually a button, and the spark plug. You can test everything with an electrical meter.
Hook the meter clamp onto any metal piece of your lawn mower. This will be the ground or negative wire. The positive wire will have a handle with a long point at the end of it.
Touch the electrical component’s connections. The meter will tell you if one of the components is bad because the needle will not move. The needle will move abruptly to the far right if the component works.
Fixing electrical issues like this requires professional help, but figuring this out helps them do so.
7 – Belt Issues
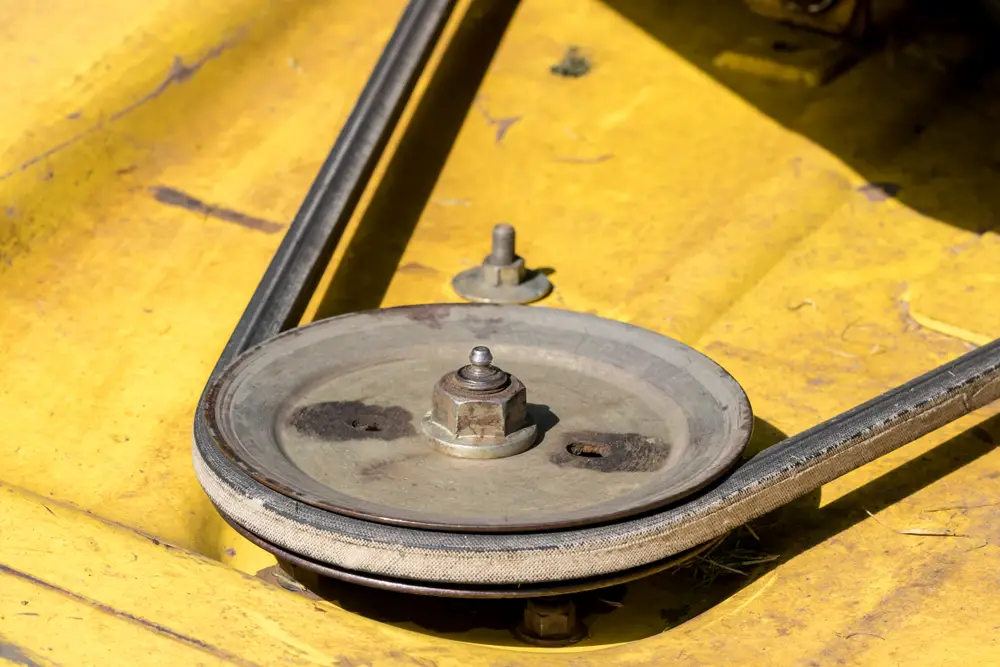
Lawn mower belts work the blades; sometimes, a separate belt goes to the drive train system. There are two primary issues with belts: stretching and cracking.
Both require replacing. If you notice these issues with your belts, get professional help, as the job requires specialized tools.
8 – Damaged Or Dull Lawn Mower Blades
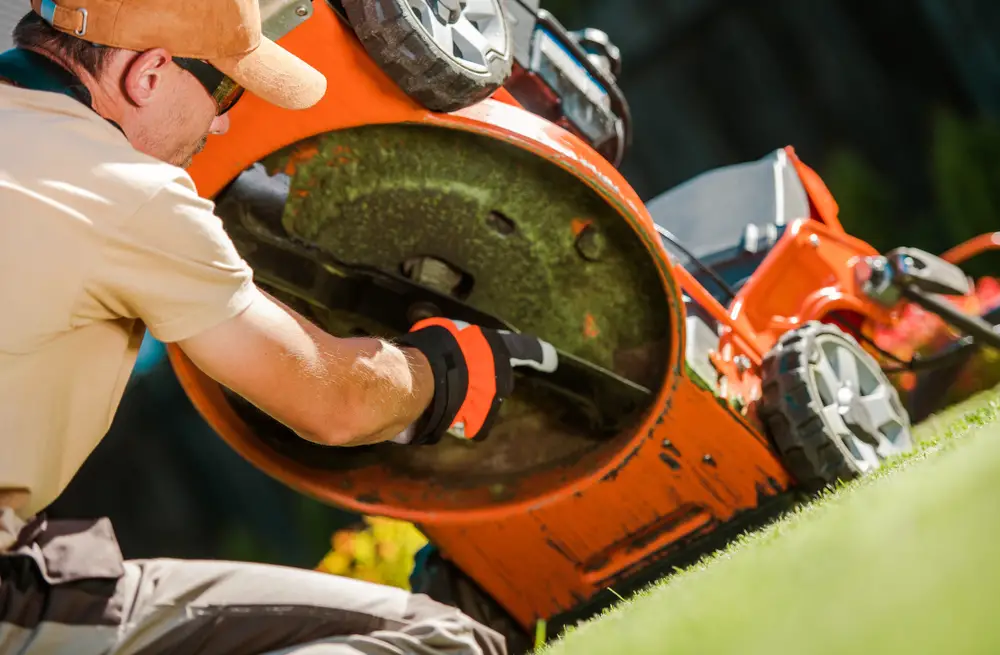
Damaged or dull lawn mower blades mess up your yard and damage your lawn mower over time because they cause the engine to work twice as hard and burn more fuel.
Inspecting And Sharpening/Replacing Lawn Mower Blades
Each blade has a single bolt under the mower to remove it. Place a 2×4 between the blade and the deck, which blocks it from turning. Review your owner’s manual for the correct size ratchet and socket (find a link for a set in the “How To Check And Replace Your Spark Plug” section), and use them to remove the blade.
If your blade shows signs of cracks or the cutting edge is rounded off too much, replace it.
Otherwise, sharpen your blade with a grinder and vise. For a grinder, you must make two to three swiping passes along the top edge and one clean swipe for the bottom side of the blade.
Put the blades back as you removed them, and ensure the bolt is tight.
9 – Drive System Failure

The drive system consists of pulleys, bearings, belts, and hydraulic systems; others have manual-shifting gearboxes.
There is little to no warning when the drive system shuts down. The pulling belt may break, which you can mainly avoid through maintenance check-ups. Belts breaking without warning happen due to bearings going bad within the pulley system.
Sometimes you may hear a grinding sound in the hydraulic systems, meaning no hydraulic oil is left in the chambers due to the hydraulic pump going out or a seal busted. The manual-shifting gearboxes will grind when no grease is left within the component, leaving metal against metal. Within seconds, they will cease to operate.
Let professionals handle the repairs or replace the drive system components.
10 – Overheating Engine
Overheating can melt the plastic and small connections within the engine. A couple of reasons the engine will overheat are clogged air vents and little to no oil in the motor, causing a lack of lubrication between metal parts.
Tips To Prevent Overheating
Here are some tips to prevent overheating of the engine:
- Keep debris away from air vents
- Check the engine oil level before mowing
- If you notice an abnormal amount of heat coming from the engine area, stop immediately and let the lawn mower rest
- Cut the grass during the cooler parts of the day
Troubleshooting And Fixing Engine-Related Problems
If you notice the engine overheating, the next event will be a cracked motor. When this happens, it may require a costly replacement. This is why it is so critical to turn off the mower quickly.
The best way to prevent this issue is to follow the tips above and keep up with maintenance. We also recommend sending the lawn mower to local technicians when overheating and significant engine problems occur.
Personal Experiences With Lawn Mower Failures
Over the years, I learned maintenance is a priority in keeping a lawn mower around and operating for many decades. Anything may break on a machine, but keeping up with it and checking the lawn mower for wear and tear will fix the smaller problems and help prevent the bigger ones.
Sometimes, I was in a hurry to beat the rain or just get the yard cut to relax and enjoy the fresh-cut grass. I skipped over the maintenance, and the breakdowns caught me. It happens to us all, but we learn lessons through experience.